

FROM RANCH TO TABLE
SRF BLOG

How to Cut a Brisket: Separating the Point and Flat for Perfect Slices
By: Snake River Farms
Cooking Guides
How to Cut a Brisket: Separating the Point and Flat for Perfect Slices
By: Snake River Farms
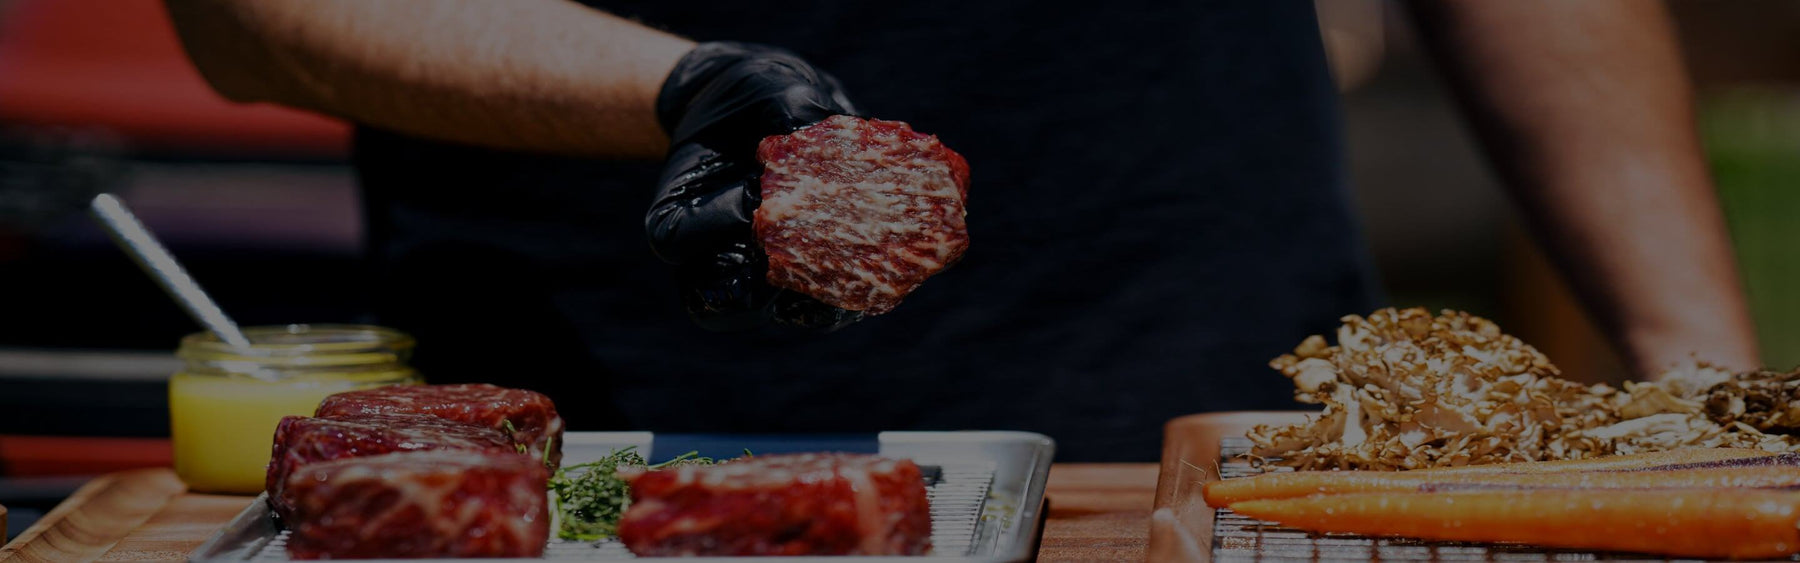
Slice a brisket wrong and even a perfect smoke ends up tough and dry on the plate. The key is understanding that a full packer brisket has two muscles, the flat and the point, and the grain runs in different directions in each. Separate them before you make a single slice. Start with the flat, cutting even slices against the grain. Rotate the point 90 degrees so it runs parallel to you, then slice against its own grain, or cube it into burnt ends. On an SRF American Wagyu brisket, the point's exceptional marbling makes it particularly well suited for both.
Let It Rest First
Resting is not optional. Pull your brisket from the smoker, crack the wrap slightly to let steam escape, and set it aside for a minimum of two hours before you make a single cut. Four hours is better. Cut too soon and the juices run straight onto the cutting board instead of staying in the meat where they belong. Once the brisket has fully rested, the hard fat has rendered, the muscles have relaxed, and you are ready to slice.
For full rest guidance, see our How to Smoke a Brisket guide→
What You'll Need
A sharp slicing knife is non-negotiable. Brisket needs a clean, long stroke against the grain, and a dull or short blade will tear the meat rather than cut it. The Shun Classic 4-Piece BBQ Set includes a 12" brisket knife purpose-built for this, plus a boning knife for separating the point from the flat. A large cutting board with enough room to maneuver a full packer is the only other thing you need.Shop Shun Classic 4-Piece BBQ Set →
How to Identify the Point and Flat
A full packer brisket is made up of two separate muscles. The flat is the leaner of the two, long and even, and slices clean. The point sits on top, thicker and fattier, with the grain running in a different direction than the flat. Between them is a seam of hard fat that, after a long smoke, has fully rendered out, making the two muscles easy to separate by hand or with a boning knife. Once separated, you have two distinct pieces to work with and each needs to be sliced against its own grain. Knowing where one ends and the other begins is the most important step before you make a single slice.
How to Cut a Brisket: Step by Step
Step 1: Find the separation point
Look for where the point ends and the flat tucks in underneath. You will see the fat seam running between the two muscles. This is your guide.
Step 2: Separate the point from the flat
Cut through the fat seam with your boning knife to separate the two muscles completely. After a long smoke the hard fat has fully rendered, so this comes apart easily. Use your hands as much as the knife.
Step 3: Slice the flat
Start with the flat. Cut even slices against the grain, working from one end to the other. A quarter inch to a third of an inch is the standard competition slice, thick enough to hold together, thin enough to be tender.
Step 4: Rotate and slice the point
Take the point and rotate it 90 degrees so it runs parallel to you. Slice against its own grain, slightly thicker than the flat. The point's higher fat content holds up well to a more generous slice.
Step 5: Or cube the point for burnt ends
The point can also be cubed and returned to the smoker to finish as burnt ends. On an SRF American Wagyu brisket the point's exceptional marbling makes it particularly well suited for this. The fat renders into something close to candy.
Watch: How to Make Brisket Burnt Ends →
Should You Slice Brisket Fat Side Up or Down?
Fat side down gives you a more stable cutting surface. The flat sits flush against the cutting board and is less likely to shift while you slice. Fat side up is a personal preference and works fine, but you lose some of that stability. Either way, the more important variable is slicing against the grain, not which side faces up. Separate the point from the flat first and the orientation question largely takes care of itself.
Do You Cut a Brisket With or Against the Grain?
Always against the grain. Slicing against the grain shortens the muscle fibers, which is what creates a tender, easy-to-eat bite. Slice with the grain and those fibers stay long, making even a perfectly smoked brisket feel tough and chewy. The nuance with brisket is that the grain runs in different directions in the point and the flat, which is exactly why separating them before you slice matters. Once they are apart, identify the grain in each muscle and cut straight across it.
Is It Better to Slice Brisket Warm or Cold?
Slice warm, not piping hot and not cold. Once your brisket has rested for a minimum of two hours, it is at the right temperature to slice. The juices have reabsorbed, the muscles have relaxed, and the fat has fully set. Cold brisket straight from the fridge is harder to slice cleanly and the fat firms up in a way that works against you. If you are reheating leftover brisket, slice it cold first and reheat the slices individually rather than reheating the whole brisket and then slicing.
What to Do With the Point: Burnt Ends
The point is the fattier, thicker muscle and it has a second life beyond slicing. Cube it into roughly one to two inch pieces, return it to the smoker, and finish in your favorite BBQ sauce until the edges caramelize and the fat renders into something close to candy. On an SRF American Wagyu brisket the point's exceptional marbling makes it particularly well suited for burnt ends, the intramuscular fat breaks down over the second cook and produces a richness that a leaner point simply can't match.
What Are Brisket Burnt Ends? →
Are You Supposed to Cut All the Fat Off?
No. Trimming happens before the cook, not at slicing. By the time your brisket comes off the smoker, the hard fat has fully rendered out and the fat cap has softened considerably. At the slicing stage you are not trimming, you are separating the point from the flat along the fat seam and slicing each muscle against its own grain. If you find yourself cutting away large pieces of fat at the slicing stage, that is a sign the brisket may have been undercooked.
How to Trim a Brisket →
Ready to Fire Up the Smoker?
The right brisket makes all the difference. Whether you're smoking for a backyard crowd or chasing your first competition, start with the best and the results follow.Shop American Wagyu Brisket →Shop Double R Ranch Brisket →Keep exploring:How to Smoke a Brisket | Brisket 101 | What Are Brisket Burnt Ends?
Read More

Brisket Internal Temperature Guide: Pull on Feel, Not Temperature
By: Snake River Farms
Cooking Guides
Brisket Internal Temperature Guide: Pull on Feel, Not Temperature
By: Snake River Farms
Most briskets are done between 198°F and 205°F, but temperature is a guideline, not a finish line. A brisket that probes tight at 200°F isn't done. A brisket that probes like warm butter at 195°F is. Pull it. Doneness is determined by feel: insert your probe into the thickest part of the flat and it should slide in with no resistance. American Wagyu brisket has more intramuscular fat than USDA Prime, which bastes the meat from the inside throughout the entire cook and makes it significantly more forgiving on temperature than conventional beef.
Brisket Temperature at Every Stage
Temperature tells you where you are in the cook. Here's what to expect from the first hour to the final rest.
Phase
Smoker Temp
Internal Temp
Cook Time
What to Look For
Action
Initial Smoke
225°F to 250°F
150°F to 160°F
Approx. 1 to 1.5 hours per lb.
Mahogany bark, fat rendering and pulling back
Wrap in unwaxed butcher paper
Wrap & Continue
225°F to 250°F
198°F - 205°F
Approx. 2 to 4 hours
Probe sliding in with decreasing resistance
Begin probe test at 198°F
The Rest
Off heat
—
2 to 4 hours minimum
Temperature redistributing through the meat
Do not slice - hold wrapped
Is Brisket Done at 190 or 200°F?
Neither is a guarantee. 198°F is the cue to start checking, not to pull.
The flat and the point cook differently. The point's heavier fat content means it typically needs more time than the flat to fully break down. A probe reading of 200°F in the flat doesn't tell you what's happening in the point. Pull on feel, not the number.
SRF Gold grade briskets in particular may need to be pulled anywhere between 210°F and 214°F to fully break down their exceptional intramuscular marbling. Don't be surprised by the higher number. Trust the feel every time.
The choice for anyone who wants to experience what a truly exceptional brisket can be → Shop SRF Gold Briskets.
Should I Pull a Brisket at 195 or 205°F?
Start the probe test at 198°F. If the probe slides in like butter, pull it. If there's any resistance, keep cooking and check every 15 minutes.
The range is wide because brisket size, fat content, and smoker consistency all affect the final number. Two briskets from the same cook can finish at different temperatures. The probe test removes the guesswork — feel is the only reliable finish line.
Why Is My Brisket at 200°F But Still Tough?
Because temperature tells you where the brisket is. Feel tells you when it's actually done.A brisket that probes tight at 200°F hasn't finished breaking down. The connective tissue hasn't fully rendered into gelatin yet, and the meat will be tough regardless of what the thermometer says. The number got you close — but close isn't done. Keep cooking and check every 15 minutes until the probe slides in with no resistance.
This is the part of the cook where conventional brisket becomes unforgiving. The window between underdone and overdone is narrow, and a few degrees in either direction can cost you hours of work.
Our American Wagyu brisket changes that equation. The superior intramuscular fat throughout the muscle bastes the meat from the inside for the entire cook, which significantly reduces the risk of a tight probe at 200°F. The marbling provides more margin if you pull slightly early or slightly late — it's harder to dry out and more consistent in the final result than anything you'll find at a grocery store.
Shop American Wagyu Brisket | Shop Double R Ranch Brisket
The Probe Test: How to Tell When Brisket Is Actually Done
Temperature gets you in the ballpark. The probe test gets you across the finish line.
Here's how to do it:
Start probing at 198°F. This is your cue to begin checking, not your cue to pull.
Insert your thermometer into the thickest part of the flat, avoiding fat pockets.
The probe should slide in with no resistance — like pushing into a soft stick of butter.
If you feel any tension at all, it's not done. Close the smoker and keep cooking.
Check every 15 minutes until the probe passes clean.
That's the finish line. Not a number on a thermometer.
Every brisket is different. Size, fat content, smoker consistency, and the grade of beef all affect where the final temperature lands. The probe test removes all of that uncertainty. A brisket that passes the probe test is done — regardless of what the thermometer reads.
For a full walkthrough of the cook from trim to rest, see our How to Smoke a Brisket Guide.
What Temperature Do You Pull Brisket Out At?
It depends on your method and your beef. Here's a clean reference:
Method
Pull Temperature
Notes
Low and Slow (225°F to 250°F)
198°F to 205°F
Start probe test at 198°F
Hot and Fast (300°F)
205°F to 210°F
Monitor closely - finish accelerates
SRF Gold Grade®
210°F to 214°F
Higher marbling requires more time to fully break down
All three are contingent on the probe test passing first. The temperature gets you to the right window. The feel tells you when to pull.
For the full low and slow and hot and fast methods, see our How to Smoke a Brisket Guide.
Low and slow is the name of the game. Watch how it's done ↓
How Long Will a Brisket Stall at 165°F?
The stall typically hits before 165°F, usually when the internal temperature reaches 150°F to 160°F. If your brisket has stopped climbing in that range, that's expected.
The stall can last anywhere from two to six hours. It's not a sign something is wrong. It's moisture evaporating from the surface of the meat, which cools it at the same rate the smoker is heating it. Do not crank the heat. Wrap to push through it.
For everything you need on wrapping technique, timing, and butcher paper vs. foil, see our When to Wrap a Brisket guide.
Is 10 Hours Too Long to Smoke a Brisket?
Not necessarily. A full packer brisket can take anywhere from 12 to 16 hours at 225°F to 250°F depending on size, smoker consistency, and the beef itself. As a general guideline, plan for approximately 1 to 1.5 hours per pound. A 10-hour cook may simply mean you're working with a smaller cut or running slightly hotter. Let the probe test be your guide, not the clock.
For full timing and temperature guidance from start to finish, see our Brisket 101: A Guide to Smoking Brisket.
The Wagyu Difference on Temperature
Our American Wagyu brisket has more intramuscular fat than USDA Prime briskets. That's not a fat cap difference — it's marbling throughout the muscle itself. On a long cook, that fat bastes the meat from the inside continuously, which produces a richer, more consistent result and significantly widens the margin for error.
A Wagyu brisket is harder to dry out, more forgiving on timing, and more consistent in the final result than anything you'll find at a grocery store. If you pull slightly early or slightly late, the marbling works in your favor.
Our Gold grade briskets in particular require more time to fully break down their exceptional marbling. Don't be surprised if a Gold needs to be pulled anywhere between 210°F and 214°F. Trust the feel over the number every time.
Shop American Wagyu Brisket | Shop Double R Ranch Brisket
Want authentic Texas brisket without the smoke? We partnered with Southside Market & Barbeque — the oldest BBQ joint in Texas — to bring you a fully cooked SRF Black® brisket smoked low and slow over Texas post oak.
Just thaw, heat, and serve.
Shop Wagyu Smoked Brisket →
Read More

How to Smoke a Brisket: Temps, Timing & the Wagyu Difference
By: Snake River Farms
Cooking Guides
How to Smoke a Brisket: Temps, Timing & the Wagyu Difference
By: Snake River Farms
Smoking a brisket requires a constant smoker temperature between 225°F and 250°F. Smoke until the internal temperature reaches 150°F - 160°F, then wrap in unwaxed butcher paper to push through the stall, the plateau where temperature stops climbing for several hours. Continue cooking to 198°F to 205°F, then rest for at least two to four hours before slicing. Doneness is determined by feel, not temperature alone: a probe should slide into the thickest part of the flat with no resistance. American Wagyu brisket has more intramuscular fat than USDA Prime, which makes the process more forgiving and helps ensure a rich, consistent result.
Looking for American Wagyu brisket? Shop SRF Brisket →
Table of Contents
What You Need Before You Start
Smoking Methods: Low and Slow vs. Hot and Fast
How to Trim a Brisket
Brisket Smoking Temperatures & Timing
When to Wrap a Brisket
How to Tell When Brisket Is Done
How to Slice a Brisket
The American Wagyu Advantage
Common Mistakes When Smoking Brisket
Featured Recipes & Related Content
Frequently Asked Questions
Ready to Smoke Your Best Brisket? Start With Better Beef
Brisket is the pinnacle of backyard BBQ. A long, slow smoke, a deep bark and a yielding, buttery slice that makes the whole neighborhood show up — there's nothing quite like pulling a perfect brisket off the smoker. The difference between a good brisket and a great one comes down to three things: consistent temperature, reliable timing and the quality of the beef you start with.
This guide covers all three. From smoker setup and temperature targets to wrapping technique and the moment you know it's done — plus why American Wagyu brisket produces a superior result compared to anything you'll find at a grocery store.
What you Need Before You Start
Brisket Selection
Start with a full packer brisket, both the point and the flat. The point is the thicker, fattier muscle that sits on top; the flat is the leaner muscle that runs beneath it. Smoking a packer gives you the best of both: the flat slices clean and the point renders into exceptionally rich, tender meat with enough fat to cube into burnt ends once the smoke is done.
What Are Brisket Burnt Ends →
Grade matters more on a long cook than almost any other preparation. A lean, low-grade brisket has nowhere to hide over twelve hours of heat — it dries out. American Wagyu brisket has more intramuscular fat than USDA Prime, which bastes the meat from the inside throughout the cook and produces a richer, more consistent result. Our Wagyu brisket is available in SRF Black® and SRF Gold® grades, with our Double R Ranch offering an exceptional USDA Choice and Prime option at a different price point.
Shop Wagyu Brisket → | Shop Double R Ranch Brisket →
Want authentic Texas brisket without the smoke? We partnered with Southside Market & Barbeque — the oldest BBQ joint in Texas — to bring you a fully cooked SRF Black® brisket smoked low and slow over Texas post oak.
Just thaw, heat, and serve.
Shop Wagyu Smoked Brisket →
Essential Equipment
Probe thermometer — A critical piece of equipment. You cannot cook brisket by feel alone until you've done it enough times to know what the stall looks like. A reliable probe keeps you from second-guessing the cook. Shop Thermapen ONE →
Unwaxed butcher paper or heavy-duty foil — For wrapping at the stall. More on this in the wrapping section.
Sharp slicing knife — Brisket needs a clean slice against the grain. A long, straight-bladed brisket knife gives you the cleanest slice. The Shun Classic 4-Piece BBQ Set includes a 12" brisket knife purpose-built for this, plus a boning knife for trimming and an 8-slot roll to bring the whole setup with you. Shop Shun Classic 4-Piece BBQ Set →
Smoker — offset, pellet, or charcoal kettle and Kamado setups all work. The principles in this guide apply to all of them. How to Choose the Right Smoker →
Seasoning
A classic Texas brisket rub is salt, coarse black pepper and garlic powder. It's simple and lets the beef do the talking. If you want something that's ready to go, SRF's BBQ Brisket Rub is built for this cook. Shop BBQ Brisket Rub →
Smoking Methods: Low and Slow vs. Hot and Fast
Brisket is forgiving when you give it time and unforgiving when you rush it. The two most common approaches both work — they just produce different results and suit different setups.
Low and Slow
Hot and Fast
Smoker Temp
225°F to 250°F
300°F
Total Cook Time
12 to 16 hours
5 to 6 hours
Smoke Ring
Pronounced
Less Pronounced
Margin for Error
More forgiving
Tighter
Best For
Maximum flavor development
Working against a serving time
Regardless of method, consistent heat management is the single most important variable. Fluctuating temps cause uneven cooking, extend the stall unpredictably, and dry out the flat. Set your temp, trust it, and resist the urge to keep opening the smoker.Charcoal setup: Grill Smoked Brisket on Charcoal Grills →
How to Trim a Brisket
Trimming is one of the most debated steps in brisket prep. Some seasoned pitmasters trim aggressively, others remove very little. The goal either way is the same: create a uniform shape and smooth surfaces so the brisket cooks evenly on the smoker.
Here's how to approach it:
Trim cold — a refrigerator-cold brisket is firmer and much easier to work with
Start fat side down — remove the hard fat between the point and the flat first. There's a natural seam separating the two muscles that guides you to your desired coverage
Flip and finish — trim any larger pieces of fat from the top to level the brisket, and remove any silver skin on the exposed muscle
Leave ~1/4 inch across the fat cap — enough to baste the meat throughout the cook, not so much that it insulates unevenly
Save the trimmings — Wagyu brisket fat renders into exceptional beef tallow
American Wagyu brisket comes with a more substantial fat cap and heavier marbling than commodity beef — you'll have more to work with, and more trimmings worth saving.
What to Do with Brisket Trimmings →
Fat Side Up or Down?
It's one of the most debated questions in brisket cooking, and opinions vary widely. The common argument for fat side up is that the cap melts and bastes the meat — but most beef experts point out that brisket muscle fibers are too tight to allow this.We've tested both and relied on feedback from pitmasters across the competition circuit. Our best results come from fat side down. Kettle, Kamado, and pellet smokers deliver most of their heat from the bottom, so placing the brisket fat side down protects the meat from direct heat and promotes a more uniform bark. Place fat side toward your primary heat source and leave it undisturbed.
Brisket Smoking Temperatures & Timing
Temperature is the backbone of a successful brisket cook. Get it right and everything else falls into place. The target smoker temp throughout the cook is 225°F to 250°F, consistent, not fluctuating.
The Stall
At some point during the cook — typically when the internal temperature hits 150°F to 170°F, the temperature will stop climbing. This is the stall, and it can last anywhere from two to six hours. It's not a sign something is wrong. It's moisture evaporating from the surface of the meat, which cools it at the same rate the smoker is heating it. The solution is to wait it out or wrap the brisket to push through it. Do not crank the heat.
Timing
There's no precise formula for how long a brisket takes, too many variables affect it. As a general guideline, plan for approximately 1 to 1.5 hours per pound at 225°F. A 14-pound packer brisket could run anywhere from fourteen to sixteen hours. Wagyu brisket's superior fat content may shift timing compared to conventional beef as the fat renders differently throughout the cook.
Temperature & Doneness Table
Phase
Smoker Temp
Internal Temp
Initial Smoke
225°F to 250°F
150°F to 160°F (the stall)
Wrap & Continue
225°F to 250°F
198°F to 205°F
The Rest
Off heat
2 to 4 hours minimum
When to Wrap a Brisket
Wrapping is how you push through the stall without sacrificing the cook. Known as the Texas Crutch, wrapping traps heat and moisture around the brisket and accelerates the final stretch of the cook. It's not cheating, it's what most competition pitmasters do.When to WrapTwo cues tell you it's time:
Temperature: internal temp between 160°F to 170°F
Visual: the bark is mahogany in color and the fat has begun to render and pull back from the meat
If the bark looks right and the temp is in range, wrap it. Don't wait for one without the other.
Butcher Paper vs. FoilOur recommendation: unwaxed butcher paper. It allows just enough moisture exchange to keep the bark intact while still pushing through the stall. Foil works — but on a Wagyu brisket with this much intramuscular fat, you don't need the extra insurance. Let the beef do the work.
Butcher Paper
Foil
Bark
Preserved - paper breathes
Softer - foil steams
Moisture
Good retention
Maximum retention
Finish Time
Slightly longer
Faster
Best For
Texture and bark quality
Speed and max juiciness
How to Wrap
Use two lengths of unwaxed butcher paper approximately 2.5 feet long — overlap them and place the brisket in the center.
Wrap all sides tightly to make a neat package — eliminate air pockets to prevent the meat from steaming unevenly.
Place the wrapped brisket back on the smoker seam-side down — the weight of the meat secures the wrap.
Continue cooking to 198°F to 205°F internal, monitoring closely after wrapping as the finish accelerates.
When pulling from the smoker, crack the wrap slightly to let heat and steam escape, place in an aluminum pan to catch any drippings, cover loosely with plastic wrap, then wrap in towels or place in a closed cooler — do not fully unwrap until ready to slice.
Watch: World Champion pitmaster Darren Warth demonstrates exactly how to wrap a brisket — step by step.
How to Tell When Brisket Is Done
Temperature gets you in the ballpark. Feel gets you across the finish line.Most briskets are done somewhere between 198°F and 205°F internal, but the number on your thermometer is a guideline, not a guarantee. A brisket that probes tight at 200°F isn't done — the connective tissue hasn't fully rendered into gelatin and the meat will be tough regardless of what the thermometer says. A brisket that probes like warm butter at 195°F is done. Pull it.
The Probe Test
Start probing around 198°F, but temperature is just your cue to start checking — not your finish line. Insert your thermometer into the thickest part of the flat, avoiding fat pockets. It should slide in with no resistance, like pushing into a soft stick of butter. If you feel any tension, it's not done. Keep cooking and check every fifteen to thirty minutes.SRF Gold grade briskets in particular may need additional time to fully break down their exceptional intramuscular marbling. Don't be surprised if a Gold needs to be pulled anywhere between 210°F and 214°F. Trust the feel over the number every time.
The Rest
The rest is not optional. Pull the brisket from the smoker and crack the wrap slightly to allow heat and steam to escape. Place in an aluminum pan to catch any drippings, cover loosely with plastic wrap, then wrap in towels or a moving blanket — or place in a closed cooler or Cambro. Hold for a minimum of two hours — four is better. This allows the juices to redistribute through the meat. Cut too soon and they run straight onto the cutting board.
The Wagyu Advantage
This is where American Wagyu brisket earns its reputation. The intramuscular fat throughout the muscle bastes the meat from the inside for the entire cook, which means a Wagyu brisket has significantly more margin for error than commodity beef. It's harder to dry out, more forgiving on timing, and more consistent in the final result.
How to Slice a Brisket
How you slice a brisket matters as much as how you smoke it. A perfectly cooked brisket sliced the wrong way will be chewy and tough. A properly sliced one will be tender, clean, and presentation-ready.
Separate the Point and Flat First
Once your brisket has rested and is ready to serve, separate the point from the flat before slicing. The two muscles run in different grain directions, which means you can't slice a whole packer in one pass. Cut through the fat seam that connects them, then slice each muscle individually against its own grain.
Slicing the Flat
The flat is the leaner of the two muscles and benefits from a thinner slice — approximately 1/4 inch. Always slice against the grain. Look at the surface of the flat and identify which direction the muscle fibers run, then cut perpendicular to them.
Slicing the Point
The point is thicker, fattier, and more forgiving. Slice it slightly thicker than the flat, again against the grain. Alternatively, cube it, return it to the smoker, and finish it as burnt ends. On a Wagyu brisket, the point has exceptional marbling that makes it particularly well suited for this.
The Right Knife
Sharp slicing knife — brisket needs a clean slice against the grain, plus a boning knife for trimming and separating the point from the flat. The Shun Classic 4-Piece BBQ Set covers all three cuts with handcrafted Japanese knives and an 8-slot knife roll for taking the setup on the road. Shop Shun Classic 4-Piece BBQ Set →What is Wagyu Deckle →
The American Wagyu Advantage
Not all brisket is created equal — and nowhere is that more apparent than on a twelve-plus hour smoke.
American Wagyu brisket has more intramuscular fat than USDA Prime. That's not a fat cap difference — it's marbling throughout the muscle itself. On a long cook, that fat bastes the meat from the inside continuously, which produces a richer, more consistent result and significantly widens the margin for error. A Wagyu brisket is harder to dry out, more forgiving on timing, and delivers a depth of flavor that commodity beef simply can't replicate.
Our Wagyu brisket is available in SRF Black and SRF Gold grades. Both start with American Wagyu genetics and are raised on a proprietary diet. SRF Gold represents the highest level of marbling available — the choice for anyone who wants to experience what a truly exceptional brisket can be.
These aren't just our words. Our brisket has been used by Grand Champion teams across every major BBQ competition in the country — dubbed the "Winningest Brisket in BBQ," every major world championship BBQ contest has been won using a Snake River Farms American Wagyu brisket.
Tuffy Stone, 6-time World BBQ Champion, award-winning chef and celebrated pitmaster, says our American Wagyu briskets are "the perfect ingredient to give you the edge you need in competition or in the backyard. Starting with the best products sets you up to win. Snake River Farms fits right into my way of doing things, providing the best experience with the best products."Shop Wagyu Brisket | Shop Double R Ranch Brisket | Shop Wagyu Smoked Brisket
"Smoked a 17.5 pound Gold grade for about 20 hours with a 6 hour rest for Thanksgiving. Reviews were fantastic, even people who don't eat red meat were having seconds and looking for leftovers the next day."— Christopher F., Verified Buyer
"Very satisfied with every order from SRF! It's always very high quality and fast shipping! I use it at home and on the competition BBQ trail!" — Anthony G., Verified Buyer
Common Mistakes When Smoking Brisket
Even experienced cooks make these. Here's what to watch for and how to fix it before it costs you a full day of cooking.
Not controlling smoker temperature
Fluctuating heat is the most common reason briskets come off the smoker uneven or dry. Set your temp, trust it, and resist the urge to keep adjusting. A reliable thermometer helps. Shop Thermapen ONE →
Wrapping at the wrong time
Too early and you sacrifice bark development. Too late and you extend the stall unnecessarily. Wait for the visual cue — mahogany bark and fat beginning to render — and confirm with temperature. Wrap when the internal temp is in the 150°F to 160°F range and starting to climb out of the stall.
Pulling by temperature alone
A brisket at 200°F that probes tight isn't done. Always use the probe test to confirm doneness — the thermometer should slide into the flat with no resistance. Temperature is a guideline, feel is the finish line.
Skipping the rest
Cutting into a brisket straight off the smoker sends the juices straight onto the cutting board. Rest for a minimum of two hours — four is better. This step is not optional.
Over-smoking
More smoke is not always better. Excess smoke after the first few hours creates bitterness and muddy flavor. Whether you're cooking on wood, charcoal, or a pellet smoker, dial back the smoke intensity once the bark is set and let the beef carry the flavor the rest of the way.
Slicing with the grain
A perfectly cooked brisket sliced with the grain will be chewy and tough. Separate the point from the flat, identify the grain direction on each muscle, and always slice perpendicular to it.
Starting with the wrong beef
A lean, low-grade brisket has nowhere to hide on a twelve-hour cook. The margin for error on commodity beef is thin. American Wagyu brisket's intramuscular fat changes the equation — more marbling means more forgiveness throughout the cook.
Featured Recipes & Related Content
The smoke is just the beginning. Here's what to do with your brisket once it comes off the smoker.
Brisket Burnt Ends
Cube the point, return it to the smoker, and finish it in sauce. Burnt ends are the richest, most flavorful bite on the entire brisket — and on a Wagyu brisket point, they're something else entirely. What Are Brisket Burnt Ends →
Tuffy Stone's Wagyu Brisket
World Champion pitmaster Tuffy Stone's competition-proven method, start to finish. If you want to see how the best in the business approach a Wagyu brisket, start here →
Brisket Nachos with Wagyu Tallow Kettle Chips
A next-level use for leftover brisket and rendered tallow. Snack-level crisp, brisket-loaded →
Smoked Brisket Burgers with Onion Whiskey Jam
Repurpose your brisket into one of the best burgers you've ever made. Not your average backyard burgers →
American Wagyu Braised Brisket in the Oven
For when the smoker isn't an option. Low and slow in the oven with American Wagyu produces a completely different result than commodity beef — rich, deeply flavored, and fork-tender. American Wagyu Braised Brisket in the Oven →
Ideas and Recipes for Leftover Brisket
Wagyu brisket leftovers are worth planning for. Tacos, hash, banh mi — the richness of the beef holds up and in some cases improves overnight. Ideas and Recipes for Leftover Brisket →
Frequently Asked Questions
What is the 3-2-1 rule for brisket?
The 3-2-1 method calls for 3 hours of smoke, 2 hours wrapped, and 1 hour unwrapped. It's a framework better suited for ribs — on a full packer brisket the timing rarely applies cleanly given the size and thickness of the cut. Use it as a starting point and let feel and temperature guide the finish.
What is the 4-2-10 rule for brisket?
A timing framework for larger packer briskets: 4 hours of smoke, 2 hours wrapped, and up to 10 hours of holding in a low oven or cooler. It's designed for competition-style cooks where serving time is fixed and the brisket needs to hold without overcooking.
Should I flip a brisket during smoking?
Generally no. Place fat side toward the heat source and leave it undisturbed to develop bark. Flipping disrupts bark formation, introduces temperature fluctuation, and adds handling time without a meaningful benefit.
Why is my brisket still tough after 10 hours?
Tenderness is determined by feel, not time or temperature. A brisket that probes tight at 200°F simply needs more time — the connective tissue hasn't fully rendered into gelatin. Keep cooking and check every fifteen to thirty minutes until the probe slides in like a soft stick of butter. This is especially true for SRF Gold grade briskets, which can require additional time to fully break down their exceptional intramuscular marbling — and can sometimes be pulled as high as 210°F to 214°F. Don't pull on temperature. Pull on feel.
What is the 4-hour rule for smoking meat?
It's a food safety guideline: meat must pass through the danger zone — 40°F to 140°F internal — within four hours to be safe to eat. For brisket cooked at 225°F or above this is rarely a concern, but worth keeping in mind for large packer briskets started cold straight from the refrigerator.
Ready to Smoke Your Best Brisket? Start With Better Beef
Consistent temperature, reliable timing, and the right beef — get those three things right and everything else follows.
American Wagyu brisket doesn't guarantee a perfect cook, but it gives you more margin for error than any other beef on the market. More intramuscular fat means the meat bastes itself throughout a twelve-plus hour smoke, producing a richer, more consistent result than commodity beef can deliver. The technique is in this guide. The beef is one click away.
Shop American Wagyu Brisket → | Shop Double R Ranch Brisket →
Read More

Kurobuta Pork Ribs: The Complete Cooking Guide
By: Dave Yasuda
Cooking Guides
Kurobuta Pork Ribs: The Complete Cooking Guide
By: Dave Yasuda
Kurobuta is a high quality breed of pork that is more flavorful and juicy than the conventional pork sold in most grocery stores. This difference is especially noteworthy in Kurobuta pork ribs. Despite their superior eating quality, Kurobuta pork ribs are easy to prepare using the basic methods used for any pork ribs.
This guide covers the cuts, what makes Kurobuta different, how to season and smoke them, and the ideal internal temperature for perfect results every time.
Table of Contents
What Is Kurobuta Pork?
Kurobuta Pork Rib Cuts
Are Pork Ribs Healthy?
How to Cook Kurobuta Pork Ribs
What Is the Ideal Pork Rib Internal Temperature?
Pork Rubs and Sauces
The 3-2-1 Pork Rib Method
Kurobuta Pork Rib Recipes
Frequently Asked Questions
What Is Kurobuta Pork?
This premium pork is sourced from a specific heritage breed of hog. Known as Berkshire in England and Kurobuta in Japan, this heritage breed is prized in both countries for its flavorful pork. Kurobuta translates to “black hog” in Japanese and refers to their black color with distinct white markings.
Specific characteristics that distinguish Kurobuta from other pork include:
Marbling: The meat is packed with a large amount of fine streaks of intramuscular fat or marbling. This gives Kurobuta pork a rich flavor with a tender, juicy texture.
Higher pH: pH (potential of hydrogen) is a scale from 0 to 14 used to measure the acidity or alkalinity of a substance. A pH less than 7 is acidic and a pH greater than 7 is basic (or alkaline).
Kurobuta pork has a pH range of 5.7 to 6.1 and conventional pork has a pH between 5.4 and 5.6.
Higher pH in pork indicates a higher level of moisture which adds juiciness and also results in a deep pink color.
Together, these two characteristics create the flavor and texture differences that make Kurobuta a superior culinary experience.
Learn more about what makes Kurobuta pork exceptional in our Complete Guide to Kurobuta Pork →
Kurobuta Pork Rib Cuts
Not all ribs are the same. Kurobuta pork is available in several cuts, each with its own texture, fat content, and ideal cooking application.
Spare Ribs — Cut from the belly side of the rib cage, spare ribs are larger, meatier, and higher in fat than baby backs. That fat renders beautifully over a long smoke, making them the classic choice for the 3-2-1 method.
Tender and moist. Slow smoked over apple wood with a homemade maple / sea salt glaze. Once you try it you will not go back. - William L., Verified Buyer
Baby Back Ribs — Shorter and leaner, baby backs come from where the rib meets the spine. They cook faster and have a slightly milder flavor profile.
Truly the best baby back ribs you will ever purchase! And this is the only place you can find quality like these! - Gladys C., Verified Buyer
Pork Short Ribs — Cut from the plate, short ribs are thick, rich, and well-suited to braising as well as smoking.
These short ribs were nothing short of perfection!! Rubbed, smoked, seared on the grill with a glaze. Used leftovers for amazing quesadillas. Have ordered twice and will order again. - Kathleen F., Verified Buyer
Smoked Spare Ribs — Already smoked and ready to finish at home.
Moving into a condo in the city meant the end to my outdoor smoker. When they arrived I place them in the fridge overnight to thaw. I knew I did not want to risk drying them out, so the next day I removed them from the packaging and vacuum sealed them in a fresh bad. I set the the Sous Vide to 165 degrees and let them bathe for 50 minutes. I removed them form the bath, sauced them up, and ran them under a broiler for five minutes. The result? Perfection! Just as good as if I had smoked these myself. Do NOT pass up these ribs. Worth every penny! - Donald J., Verified Buyer
Explore Our Kurobuta Pork Rib Cuts
From fall-off-the-bone spare ribs to rich, meaty short ribs, every Kurobuta rib cut delivers the exceptional marbling and deep flavor this heritage breed is known for. Find the right cut for your next cook below.
Kurobuta Spare Ribs
Large, meaty ribs from the belly side of the rib cage. Higher fat content means exceptional flavor and the perfect canvas for the 3-2-1 smoking method.
Shop Spare Ribs →
Kurobuta Baby Back Ribs
Shorter, leaner ribs from where the rib meets the spine. Tender and slightly milder in flavor, with a faster cook time than spare ribs.
Shop Baby Back Ribs →
Kurobuta Pork Short Ribs
Thick, richly marbled short ribs cut from the plate. Bold flavor and a dense texture that shines whether smoked low and slow or braised.
Shop Pork Short Ribs →
Smoked Pork Spare Ribs
Already smoked and ready to finish at home. All the flavor of a full low-and-slow cook with a fraction of the time — ideal for weeknights or last-minute entertaining.
Shop Smoked Spare Ribs →
Spare ribs or baby backs — still deciding? We put them head to head so you don't have to.
Are Pork Ribs Healthy?
Quick answer: A 3 oz. serving of pork ribs contains about 25 grams of protein and essential nutrients including zinc and selenium. They are higher in calories and saturated fat, so they fit best as part of a balanced diet enjoyed in moderation.Kurobuta ribs are richer than commodity pork ribs due to their higher intramuscular fat content — the same marbling that gives them their exceptional flavor and juiciness. That fat is part of what makes them worth seeking out, and like any richly marbled cut, they're best enjoyed as the centerpiece of a great meal.
How to Cook Kurobuta Pork Ribs
The basic technique for making delicious Kurobuta pork ribs is simple. The ribs are seasoned and cooked in a smoker or grill at a low temperature of about 225°F. to 250°F., wrapped in foil to break down the collagen and fat, then finished with sauce that melts and caramelizes.
This is often referred to as the 3-2-1 method and works for pellet smokers and grills. There are variations on this technique where wrapping step is left out, but the 3-2-1 method is a surefire way to make tender, mouth-watering ribs.
What Is the Ideal Pork Rib Internal Temperature?
Target temp: 198°F to 203°F for tender, pull-apart Kurobuta pork ribs.
Target an internal temperature range of 198°F to 203°F for Kurobuta pork ribs. Pork is safe to eat at 145°F, but a higher temperature ensures the intramuscular fat renders and the collagen breaks down so it is tender.
When using the 3-2-1 method (instructions below), you are relying on time and not temperature. This is one of the few times we recommend measuring time instead of temp.
Pork Rubs and Sauces
A dry rub is a key ingredient for cooking spare ribs. Pork rubs generally contain sugar, salt, and other herbs and spices. There are many good quality pork rubs available at retail stores and online. Snake River Farms sells an excellent Perfect Pork Rub — apply it generously so the meat is coated but still visible through the rub. You can also make your own using a good recipe.
Pork rib sauces are an optional ingredient. If you prefer Memphis style dry spare ribs, you can skip the sauce entirely. We've found most folks enjoy sauce on their spare ribs so we've included that step. One of our favorite pre-made sauces is Tuffy Stone's Original BBQ Sauce — Tuffy is a four-time World BBQ Champion and his sauce is available on our website. As with rubs, it's also easy to make your own sauce to customize the flavor to your preference.Ready to cook like a champion? Discover Tuffy Stone's spare rib recipe.
The 3-2-1 Pork Rib Method
The 3-2-1 method gets its name from the three phases of the cook: 3 hours on the smoker unwrapped, 2 hours wrapped in foil, and 1 final hour back on the grate to set the sauce and build the bark. It works reliably on pellet smokers, charcoal, and gas grills.
Ingredients
2 to 4 racks of SRF Kurobuta Spare Ribs or Baby Back Ribs
Vegetable oil or yellow mustard
SRF Perfect Pork Rub
Tuffy Stone Original BBQ Sauce
Butter
Honey
Brown sugar
Apple juice in a spray bottle
Instructions
Remove the membrane on the rib side of each rack, if desired.
Brush each rack of ribs with oil or mustard. Apply a good sprinkling of rub. Be generous, but you want to be able to see the meat through the rub. Let stand one hour.
Set your smoker or grill to a temperature of 225°F to 250°F. Add apple wood chunks or chips to add a hint of smoky flavor.
Place ribs meat side up on the grates of the grill or smoker. Spray ribs with apple juice every 30 minutes for 3 hours.
Remove ribs from the grill, season with a sprinkling of brown sugar, several pats of butter and a drizzling of honey. Wrap each rack in 2 large sheets of aluminum foil.
Overlap the two sheets to get a secure seal.
Place wrapped ribs back on the grill and cook for 2 more hours.
Pull ribs from the grill or smoker and remove from the foil packets. Place ribs on the grill for 30 minutes, then baste with sauce. Allow to cook for another 30 to 60 minutes or until the tip of a small knife slips easily out of the meat.
Serve with extra sauce on the side.
Kurobuta Pork Rib Recipes
From weeknight-friendly oven bakes to competition-worthy smoked racks, these recipes put Kurobuta pork ribs to work. Each one is built around the rich marbling and deep flavor this heritage breed delivers.
Hot Honey Party Ribs
Sweet heat meets fall-off-the-bone Kurobuta spare ribs. A crowd-pleasing recipe built for entertaining.
Get the Recipe →
Gochujang Glazed Sticky Ribs
Bold Korean-inspired flavors coat tender Kurobuta ribs in a sticky, spicy-sweet glaze that caramelizes beautifully on the grill.
Get the Recipe →
Easy Oven-Baked Ribs
No smoker required. This straightforward oven method delivers tender, flavorful Kurobuta ribs any night of the week.
Get the Recipe →
Slow Cooker BBQ Pork Short Ribs with Green Apple and Toasted Pecan Slaw
Rich Kurobuta short ribs slow-cooked in BBQ sauce, served alongside a bright, crunchy slaw that balances every bite.
Get the Recipe →
Frequently Asked Questions
Are pork ribs healthy?
A 3 oz. serving of pork ribs contains about 25 grams of protein and essential nutrients including zinc and selenium. They are higher in calories and saturated fat, so they fit best as part of a balanced diet enjoyed in moderation. Kurobuta ribs are richer than commodity pork due to their higher intramuscular fat content — the same marbling that makes them exceptional.
What internal temperature should pork ribs reach?
Target an internal temperature of 198°F to 203°F for tender, pull-apart pork ribs. Pork is safe to eat at 145°F, but ribs need the higher temperature to fully render the intramuscular fat and break down collagen. When using the 3-2-1 method, time is the more reliable guide than temperature.
What is the difference between spare ribs and baby back ribs?
Spare ribs are cut from the belly side of the rib cage and are larger, meatier, and higher in fat. Baby back ribs come from where the rib meets the spine — they are shorter, leaner, and cook faster. Both work well with the 3-2-1 method. For a deeper look, see our guide: Baby Back Ribs vs Spare Ribs: Understanding the Difference.
What is the 3-2-1 rib method?
The 3-2-1 method is a three-phase smoking technique: 3 hours unwrapped on the smoker at 225°F to 250°F, 2 hours wrapped tightly in foil with butter, honey, and brown sugar, and 1 final hour unwrapped with sauce applied to set the bark. It works on pellet smokers, charcoal, and gas grills and is a reliable method for consistently tender ribs.
What is Kurobuta pork?
Kurobuta (also known as Berkshire in the US) is sourced from a specific heritage breed of hog known as Berkshire in England and Kurobuta — meaning "black hog" — in Japan. It is distinguished by exceptional marbling and a higher pH than conventional pork, which produces a juicier, deeper-pink cut with richer flavor and more tender texture.
Can I cook Kurobuta pork ribs in the oven?
Yes. While smoking delivers the deepest flavor, Kurobuta pork ribs cook beautifully in the oven as well. See our Easy Oven-Baked Ribs recipe for a straightforward method that delivers tender, flavorful results without a smoker.
Author Bio
Dave Yasuda has worked with Snake River Farms for over 12 years, cooking virtually every product we sell. He has prepared SRF products for photoshoots, food festivals, company events, and customers. A skilled home cook, Dave has collaborated in the kitchen with award-winning chefs, recipe developers, and content creators to enhance his culinary skills. He has also been a featured guest on numerous food-centric podcasts, including Bon Appetit’s “Dinner SOS” hosted by Chris Morocco.
Read More

How to Cook Beef Short Ribs
By: Snake River Farms
Cooking Guides
How to Cook Beef Short Ribs
By: Snake River Farms
How to Cook Beef Short Ribs
Beef short ribs may look intimidating, but with time and the right technique, they transform into one of the most tender and flavorful cuts of beef. Thanks to the rich marbling of our American Wagyu, short ribs stay juicy and forgiving whether you braise, slow cook, roast, or smoke them.
We love short ribs for their versatility. They shine in classic braised short ribs, smoked beef short ribs, oven-cooked preparations, and bold Korean or Asian-inspired recipes.
Experience what exceptional marbling brings to short ribs with American Wagyu Short Ribs and Plate Short Ribs.
These are perhaps the most amazing short ribs in the world. HOLY MOLY BUT THESE WERE AMAZING braised into a beef stew like arrangement.
– Sae F., Verified Buyer
What Makes Beef Short Ribs Unique?
Cut from the plate or chuck, short ribs deliver a meaty flavor balanced by rich marbling and connective tissue. During slow cooking, that collagen melts into gelatin, giving the meat its silky texture and deep flavor. This combination of structure and marbling makes short ribs ideal for braising, smoking, or slow cooking—and endlessly versatile with different flavor profiles.
Short ribs are also one of the most adaptable cuts we work with. They pair just as naturally with red wine and herbs as they do with soy, ginger, garlic, and sesame.
The best short ribs we have ever had. We followed the online recipe from SRF and they turned out perfect, not fatty, so flavorful and meaty.– Jeanne G., Verified Buyer
Choosing Your Cooking Method
There is no single best way to cook beef short ribs. We suggest to choose a method based on time, equipment, and the type of meal you want to serve. Below are the most reliable ways to cook beef short ribs.
Braised Short Ribs
Braised short ribs are the most traditional preparation and one of the most popular for good reason. This method uses low heat and liquid to slowly break down connective tissue.
Braise short ribs in the oven or on the stovetop at 275°F to 300°F for about 2.5 to 3 hours.
Cooking Insight: Do beef short ribs get more tender the longer you cook them? Yes. Collagen needs time to convert into gelatin, and rushing the process results in tough meat.
How to Braise Beef Short Ribs
Braising is the foundation for many classic beef short rib recipes and one of the most reliable ways to achieve tender results.
Start with bone-in American Wagyu short ribs, patting them dry and seasoning generously with salt and black pepper.
Sear the ribs in a heavy Dutch oven until deeply browned on all sides.
Aromatics like onion, garlic, carrots, and celery go into the pot next.
Deglaze with red wine, beef broth, or a soy-based liquid for Asian variations.
The ribs return to the pot, partially submerged in liquid.
Cover and cook low and slow:
Oven: 275°F to 300°F
Stovetop: gentle simmer
Time: 2.5 to 3 hours
The ribs are ready when the meat pulls away easily from the bone.
Rest the ribs for 15 minutes before serving.
Cooking Insight: How do you know braised short ribs are done? When pierced with a fork, the meat should feel tender and release easily from the bone.
Smoked Beef Short Ribs
Smoked beef short ribs are a favorite for barbecue enthusiasts who want bold, beef-forward flavor.
Smoke the short ribs at 225°F, first, season generously, and then cook until the internal temperature reaches 190°F to 200°F. Expect a cook time of 4 to 5 hours, followed by a proper rest.
Ready to fire up the smoker? See how to smoke short ribs in our Smoked Short Ribs recipe.
This is the third time I’ve smoked the Wagyu Plate Short Ribs. They had the perfect amount of marbling and unbelievable flavor.– Kenton, Verified Buyer
How to Smoke Beef Short Ribs
Smoking short ribs rewards patience and careful temperature control.
Preheat the smoker to 225°F.
Excess surface fat is trimmed, leaving a thin protective layer.
We season generously, often with coarse black pepper or a pepper-forward blend.
The ribs smoke uncovered for 4 to 5 hours until they reach 190°F to 200°F internally.
After wrapping loosely, we rest the ribs for 30 minutes.
The ribs are sliced between the bones and served.
Cooking Insight: Why do smoked short ribs finish at such a high internal temperature? Short ribs are done when collagen has fully broken down, which happens closer to 190°F to 200°F rather than at medium-rare temperatures.
Ready to cook short ribs the right way? Start with American Wagyu Ribs.
How to Cook Beef Short Ribs in the Oven
The oven is one of the most approachable tools for cooking short ribs, especially for beginners. We rely on two primary oven methods.
Low and slow oven braising at 275°F to 300°F
Dry-roasted oven short ribs finished with a glaze or sauce
Cooking Insight: What’s the best temperature to cook short ribs in the oven? Cook short ribs at 275°F to 300°F to allow connective tissue to break down without tightening the meat.
How to Cook Beef Short Ribs in the Oven (Roasted, Not Braised)
This method is ideal if you want a roasted texture instead of a sauce-based dish.
Dry-Roasted Short Ribs
Season the ribs generously.
Roast uncovered at 300°F for 2 to 3 hours.
Finish under the broiler or brush with a glaze during the final 15 minutes.
Choose this method when you want a concentrated beef flavor and a firmer exterior.
Slow Cooker Short Ribs
If you want hands-off cooking, the slow cooker is a go-to for tender, flavorful short ribs. Steady, consistent heat over several hours melts collagen and deepens flavor—perfect for braised classics or global-inspired dishes.
We recommend searing the ribs first, then slow cooking them for 7 to 8 hours on low or 4 to 5 hours on high until fork-tender.
Korean or Asian-Inspired Short Ribs
The slow cooker also shines for bold, Asian-style short ribs that balance savory, sweet, and spicy flavors. Ingredients like soy sauce, garlic, ginger, sesame oil, and gochujang create a deep, aromatic base as the ribs simmer to tenderness.
While Korean short ribs traditionally use the flanken cut, we love how English-cut American Wagyu short ribs adapt to these flavors—they deliver exceptional richness and texture.
A simple base includes soy sauce, brown sugar, garlic, and ginger, with optional additions like mirin, sesame oil, rice vinegar, or a touch of gochujang for heat. Braise or slow cook until the meat easily pulls from the bone, then finish with scallions and sesame seeds for freshness.
Cooking Insight: Can English-cut short ribs be used for Korean-style braises? Yes. While flanken is traditional, English-cut American Wagyu short ribs offer deeper beef flavor and outstanding tenderness in slow-cooked dishes.
Ready to try these flavors? Put these flavors to work with our Asian Braised Short Ribs recipe.
How Long to Cook Beef Short Ribs
Cook time depends on the method and temperature.
Method
Temperature
Time
Notes
Braised
275 to 300°F
2.5 to 3 hrs.
Tender, saucy, texture
Smoked
225°F
4 to 5 hrs.
Deep smoky flavor
Oven-Roasted
300°F
2 to 3 hrs.
Crisp edge, rich flavor
Slow Cooker
Low
7 to 8 hrs.
Hands-off cooking
Slow Cooker
High
4 to 5 hrs.
Hands-off cooking
Cooking Insight: Time matters more than the clock. Short ribs are done based on tenderness, not minutes. If they are not fork-tender, they need more time.
Frequently Asked Questions about Beef Short Ribs
Should beef short ribs be cooked bone side up or down?
We recommend bone side down to help shield the meat from direct heat.
Do short ribs get more tender the longer you cook them?
Yes, when cooked at low temperatures. High heat can toughen the meat before collagen breaks down.
What is the best temperature to cook short ribs?
For most methods, we cook short ribs between 275°F and 300°F.
Our Favorite Short Rib Recipes
Beer-Braised Short Ribs
Fall-off-the-bone tender beef braised with sautéed vegetables, fresh herbs, and dark beer for rich, comforting flavor. Serve over mashed potatoes or polenta for a classic meal.
View Recipe →
Birria-Style Slow Roasted Short Rib
Chef Jorge Velazquez combines short ribs with traditional Mexican birria flavors in this slow-roasted recipe, delivering tender, deeply savory beef in every bite.
View Recipe →
French Onion Wagyu Short Ribs with Gruyere Toast
Slow-braised Snake River Farms Wagyu Short Ribs with caramelized onions, white wine, and beef broth, finished with Gruyère toast for a rich, elevated comfort dish.
View Recipe →
Bloody Mary Braised Short Ribs with Pan-Fried Potato
Braise short ribs in a premade Bloody Mary cocktail for a unique tomato-and-spice flavor. Slow-cooked beef becomes rich, tender, and deeply flavorful in every bite.
View Recipe →
Short Rib Tacos with Avocado Tomatillo Salsa
Ultra-tender, slow-braised Wagyu short ribs served in corn tortillas with avocado tomatillo salsa, pickled onions, cilantro, and cotija cheese for bold, satisfying flavor.
View Recipe →
Pastrami Beef Short Ribs
Thick American Wagyu short ribs cured in a bold pastrami brine, smoked low and slow for tender, juicy beef with a peppery, flavorful crust. Finished with a sharp relish for a perfect bite.
View Recipe →
Short Ribs Made Simple
American Wagyu short ribs reward time and care with unmatched richness and tenderness. Whether braised, roasted, smoked, or slow cooked, the result is pure comfort in every bite.
Choose your method, give the ribs time, and the results will speak for themselves.
Ready to cook short ribs the right way? Start with American Wagyu Short Ribs and Plate Short Ribs.
Read More

How to Cook Beef Tenderloin
By: Snake River Farms
Cooking Guides
How to Cook Beef Tenderloin
By: Snake River Farms
How to Cook Beef Tenderloin
When you set a whole beef tenderloin on the table, people assume you spent hours in the kitchen. The secret? This show‑stopping roast is actually one of the easiest holiday mains you can make.
Beef tenderloin is prized for its fine texture, buttery tenderness, and elegant presentation. With the right method, it cooks quickly, slices beautifully, and delivers that steakhouse‑quality experience at home. At Snake River Farms, we use this same premium cut to create our top‑selling filet mignons, so you can expect exceptional tenderness and rich American Wagyu flavor in every bite.
If you’ve ever felt intimidated by cooking a whole tenderloin, this guide walks you through it step by step. From seasoning and tying to doneness and slicing, we’ll show you how to get it right the first time.
Ready to cook a beef tenderloin that’s tender, elegant, and stress-free? Start with American Wagyu Beef Tenderloin for consistent results and exceptional flavor.
What Makes Beef Tenderloin So Special?
Beef tenderloin comes from a muscle that does very little work, which is why it’s naturally tender. Unlike tougher cuts that rely on fat or connective tissue breaking down over time, tenderloin is soft from the start.
What sets Snake River Farms beef tenderloin apart is our American Wagyu genetics. You’ll see a finer texture, subtle marbling, and a clean, rich flavor that elevates this classic cut without overpowering it. It’s the same tenderloin we portion into our filet mignons, making it one of the most versatile and refined cuts you can cook.
Additional benefits of beef tenderloin:
Cooks faster than most roasts
Elegant enough for holidays and celebrations
Simple seasoning lets the beef shine
Easy to portion for serving
Your tenderloin arrives frozen, so plan ahead. Proper thawing is key for even cooking. We recommend reviewing our Guide to Thawing Large Cuts before you begin.
Want to stretch your budget? Learn how to cut a tenderloin roast into steaks for filet mignon at home.
Exquisite quality and taste, some of the finest beef tenderloin I have yet experienced.
- Dio F., Verified Buyer
How to Cook Beef Tenderloin (The Method We Recommend Most)
Of all the methods we've tested in our kitchens, one stands out for delivering consistent, foolproof results every time. The reverse sear technique takes the guesswork out of cooking beef tenderloin, protecting its naturally tender texture while creating that beautiful steakhouse crust. If you're cooking tenderloin for the first time—or even if you've done it a hundred times—this is the method we trust most.
Why the Reverse Sear Works Best for Tenderloin
Tenderloin is lean and narrow, which means it benefits from gentle heat. Cooking low and slow first protects its delicate texture, while a short, high-heat finish creates a beautiful crust without overcooking the interior.This reverse sear method is consistent, forgiving, and ideal for anyone cooking tenderloin for the first time. Tying your roast with butcher's twine helps it cook evenly, though it's optional if your tenderloin is already uniform in shape.Watch: How to Tie a Roast Like a Pro | Simple Butcher's Twine Tutorial
Step-by-Step: Reverse Sear Beef Tenderloin
Thaw the tenderloin completely in the refrigerator, allowing 2 to 3 days for a whole roast. See our thawing guide for best results.
Trim away any visible silver skin if needed. This thin membrane won't break down during cooking and can affect texture.
Season generously with kosher salt. Add black pepper if desired.
Place the tenderloin on a wire rack set over a baking sheet.
Roast at 250°F until it reaches your target internal temperature, about 45 to 60 minutes for a whole tenderloin.
Pull the roast at the following temperatures:→Rare: 110°F→Medium rare: 120°F→Medium: 130°F→Medium well: 140°F
Rest the tenderloin for 10 to 30 minutes. Larger roasts benefit from longer resting times.
Increase oven temperature to 500°F.
Return the roast to the oven and sear for 5 to 10 minutes until a golden crust forms.
Slice into ½-inch medallions and serve.
Ready to impress? Start with American Wagyu Beef Tenderloin and taste the difference.
Watch: Tenderloin Roast Recipe | The Complete Holiday Meal
Tenderloin Doneness Guide
Beef tenderloin is best cooked using internal temperature rather than time alone. Because thickness can vary from roast to roast, a reliable meat thermometer ensures consistent results every time.
Doneness levels:
Rare: cool red center (pull at 110°F)
Medium rare: warm red center (pull at 120°F)
Medium: warm pink center (pull at 130°F)
Medium well: slight pink (pull at 140°F)
We recommend pulling your roast 5 degrees before your target doneness, as the temperature will continue to rise during the resting period.
Serving size: Plan on approximately 6 to 8 ounces per person when serving beef tenderloin as a main course.
Want perfect doneness every time? Use the SuperFast Thermometer to track internal temperature and pull your tenderloin at exactly the right moment.
How Long to Cook Beef Tenderloin
Cooking time depends on size, oven temperature, and preferred doneness. Use these guidelines as a reference.
Whole tenderloin: 1½ to 2 hours total using reverse sear (including rest and final sear)
Half tenderloin: 25 to 30 minutes initial roast, plus sear
Per pound at 250°F: approximately 35 to40 minutes
At 350°F: 20 to 25 minutes per pound, depending on thickness
Always confirm doneness with an internal thermometer for best results.
Best Cooking Methods for Beef Tenderloin
Reverse Sear (Best Overall Method): Low heat followed by a quick sear delivers the most consistent tenderness and even doneness. Refer to the step‑by‑step method above for detailed guidance.
Traditional Oven Roast at 425°F: For a classic approach, roast tenderloin at a higher temperature for a shorter time. This method works well if you prefer a more conventional preparation.
Watch: Beef Tenderloin Roast Recipe | Buttery Crust Meets Bright Citrus Sauce
Grilled Tenderloin Roast: Sear the tenderloin over direct high heat, then finish over indirect heat until it reaches your desired internal temperature.
Sous Vide Beef Tenderloin: Sous vide delivers precise doneness and exceptional tenderness. Finish with a quick sear to develop color and flavor. Learn what sous vide cooking is and how it can take your tenderloin to the next level.
Common Mistakes to Avoid
We've seen these mistakes trip up even experienced cooks. Here's what to watch out for:
Overcooking the roast: Tenderloin has very little fat to buffer heat, so it can go from perfectly pink to overdone quickly. Pull it earlier than you think.
Skipping the resting period: Resting allows the juices to redistribute throughout the meat. Cut too soon and those juices end up on your cutting board instead of in each bite.
Not using a thermometer: Guessing doneness by time alone is risky. A reliable instant-read thermometer takes the guesswork out.
Searing too long at the end: The reverse sear's final step should be quick—just long enough to brown the exterior. Over-searing can push the meat past your target doneness.
Starting with a partially frozen tenderloin: Uneven thawing leads to uneven cooking. Always thaw completely in the refrigerator. Review our thawing guide if you need help.
How to Season a Beef Tenderloin
Beef tenderloin shines with minimal seasoning. Because the meat itself is so tender and flavorful—especially with American Wagyu genetics—we recommend keeping it simple.
The basics: A generous coating of kosher salt is often all you need. Add freshly cracked black pepper if you like a bit of spice.Optional additions:
Garlic and herb blends
Fresh rosemary or thyme
Cracked peppercorn crust
Citrus zest for brightness
We suggest avoiding heavy marinades or overly complex rubs that can mask the natural flavor of premium beef. Let the tenderloin speak for itself.
Get the tenderloin that makes simple seasoning shine—shop Tenderloin Roasts now.
Seasoned it with salt and pepper, seared it on the grill, and finished it to a medium rare on the smoker, very flavorful and it was so tender you could cut it with a plastic spoon, and even received a marriage proposal because of this cut of meat, can't wait to cook one again.- John, Verified Buyer
What to Serve with Beef Tenderloin
Beef tenderloin pairs beautifully with classic sides and simple sauces that complement without competing.
Popular side dish options:
Roasted potatoes or mashed potatoes
Green beans almondine
Roasted root vegetables
Creamed spinach
Simple arugula salad
Sauce pairings:
Horseradish cream
Rich pan sauce
Red wine reduction
Brandy peppercorn sauce
Dijon cream sauce
For a complete holiday spread, explore our Complete Holiday Meal: Tenderloin Roast guide, which walks you through planning an entire menu around this centerpiece roast.
Our Favorite Tenderloin Recipes
Looking for more ways to prepare beef tenderloin? We've developed several recipes that showcase different flavor profiles and techniques:
Tenderloin Roast with Brandy Peppercorn Sauce – Rich, peppery, and elegant
Wagyu Tenderloin Roast with Dijon Sauce – Tangy and sophisticated
Pistachio-Crusted Beef Tenderloin with Roasted Garlic Horseradish Cream Sauce – Nutty, textured, unforgettable
Herb Roasted Tenderloin with Horseradish Cream – Classic and crowd-pleasing
Each recipe highlights the tenderness and flavor that make beef tenderloin such a special cut.
Final Tips for Cooking Beef Tenderloin
Before you get started, here are a few reminders that will help ensure success:
Trust internal temperature over time. Every oven and every roast is slightly different. Your thermometer is your most reliable tool.
Rest longer than you think you need. We know it's tempting to slice right away, but patience pays off. The texture and juiciness depend on that resting period.
Keep seasoning simple. Let the quality of the beef shine through. American Wagyu tenderloin doesn't need much help.
Don't be afraid of the roast. Tenderloin looks impressive, but it's more forgiving than people think. Follow the steps, use your thermometer, and you'll do great.
Order American Wagyu Beef Tenderloin and make your next meal unforgettable.
Read More

Christmas Prime Rib: The Ultimate Holiday Dinner Guide
By: Snake River Farms
Cooking Guides
Christmas Prime Rib: The Ultimate Holiday Dinner Guide
By: Snake River Farms
Christmas Prime Rib
There’s something magical about gathering around the table for a Christmas prime rib dinner. The aroma, the golden crust, the first juicy slice — it’s a holiday tradition that brings everyone together. At Snake River Farms, we believe the centerpiece of your holiday meal should be as memorable as the celebration itself. That’s why we craft this guide to help you plan, cook, and serve the perfect prime rib Christmas dinner with confidence.
Whether you’re roasting for a cozy family meal or hosting a grand holiday feast, we’ll walk you through how to select the best cut, prepare it perfectly, and round out your prime rib Christmas dinner menu with sides, desserts, and expert carving tips.
Cook the Perfect Prime Rib to see the technique in action:
Choose the Best Christmas Prime Rib
When it comes to Christmas prime rib, the key to a flawless feast starts with selecting the right cut. Whether you’re hosting a grand holiday gathering or an intimate prime rib Christmas dinner, the right roast sets the tone for the entire menu.
Bone-In vs. Boneless
Bone-In Prime Rib: Delivers unbeatable flavor and a classic presentation. The bones insulate the meat, keeping it juicy as it roasts.
Boneless Prime Rib: Easier to carve and serve — ideal for streamlined entertaining.
Pro Tip: To enjoy the best of both worlds, cut the bones away before cooking and tie them back on with butcher’s twine. After the roast is done, remove the rib section and return it to the oven for about 20 minutes. Slice the rack into individual ribs and serve alongside the roast as a bonus treat for your guests.
Portion Planning
Plan for 1 to 1.5 pounds per person. A 7-bone roast serves about 12 to14 guests, while smaller roasts are perfect for intimate dinners.
Prime Rib Options from Snake River Farms
Grade
Flavor Profile
Best For
USDA Choice
Balanced marbling, approachable flavor
Large gatherings
SRF Gold Grade Wagyu
Rich marbling and tenderness
Show stopping special occasions
SRF Black Grade Wagyu
Luxurious, intensely marbled roast
The ultimate indulgence
Make this year's holiday unforgettable — Shop Prime Rib Today.
Planning ahead? See our Guide to Thawing Large Cuts, Roasts, and Hams for timing and tips.
How to Cook a Christmas Prime Rib
Once you’ve selected the perfect Christmas prime rib, it’s time to focus on preparation. From seasoning to roasting, every step plays a role in achieving that signature Snake River Farms flavor — a melt-in-your-mouth tenderness and rich, buttery taste that defines a true holiday centerpiece.
Whether you’re serving a prime rib Christmas dinner for a large gathering or an intimate meal, proper technique makes all the difference. With the right tools, timing, and a few insider tips, you can bring steakhouse-quality results to your own kitchen.
Oven-Roasted Prime Rib
Preparation:
Thaw the roast in the refrigerator for 3 to 4 days. Slow, refrigerator thawing preserves flavor and texture. For step-by-step guidance on thawing large roasts safely, see our Guide: How to Thaw Large Cuts, Roasts, and Hams.
Season generously with kosher salt or your preferred rub.
Let the roast sit at room temperature for 2 hours before cooking.
Cooking:
Preheat the oven to 350°F.
Roast the prime rib until it reaches the desired internal temperature:
Rare: 110°F | Medium Rare: 120°F | Medium: 130°F | Medium Well: 140°F
Rest the roast for at least 30 minutes before slicing.
Your Guide to the Perfect Oven-Roasted Prime Rib with Red Wine Sauce Recipe.
Smoked Prime Rib
Preparation:
Thaw the roast in the refrigerator for 3 to 4 days for even cooking.
Apply your favorite seasoning or rub to the roast.
Let the roast sit at room temperature for 2 hours before smoking.
Smoking:
Preheat the smoker to 225°F.
Smoke the roast until it reaches the desired internal temperature:
Rare: 110°F | Medium Rare: 120°F | Medium: 130°F | Medium Well: 140°F
Resting: Rest the smoked roast for at least 30 minutes before slicing to retain juices.
Follow our Smoked Prime Rib with Orange Rosemary Rub recipe for step-by-step guidance.
Learn how to smoke a prime rib like a pro with our complete smoking guide.
Master smoking your Christmas Prime Rib with our step-by-step video:
Insider Tip: Smoke Without the WorkLove the flavor of smoked beef but short on time? Our Wagyu Smoked Prime Rib is fully smoked and ready to reheat, delivering all the rich, wood-fired taste of a traditional smoke without the long cook.- Simply reheat to an internal temperature of 120 to 125°F for medium rare, then rest and carve.- Finish in your oven or sous vide for a gentle, even reheat.- Perfect for busy hosts who still want that impressive, smokehouse-style centerpiece on the Christmas table.
Fool-Proof Techniques & Tips
Cooking a Christmas prime rib doesn’t have to be intimidating. With a few tried-and-true techniques, you can achieve a tender, evenly cooked roast that’s worthy of a holiday celebration.
The “500 Rule” for Prime Rib
Also called the closed-oven method, the 500 Rule is a simple way to cook prime rib:
Preheat the oven to 500°F.
Place your seasoned roast inside and close the door.
Cook for 5 minutes per pound (e.g., 6 lb × 5 = 30 minutes).
Turn off the oven and let the roast rest inside for about 2 hours.
This generally produces a medium-rare roast, but note:
You can’t check internal temperature unless using a leave-in thermometer with an external readout.
The high heat sears the exterior but can slightly overcook outer layers.
Pro Tip: If you prefer more control over doneness, the reverse sear method ensures a perfectly pink interior with a flavorful crust.
Internal Temperature Is Key: Use the prime rib temp chart below to cook to your preferred doneness.
Preference
Description
Internal Temp.
Rare
Red, cool center
110°F
Medium Rare
Red, warm center
120°F
Medium
Pink throughout
130°F
Medium Well
Primarily grey, sliver of pink
140°F
Use the times below as a helpful reference, but let your thermometer have the final say. This approach ensures your prime rib turns out perfectly every time.
Weight
Medium Rare
Medium
About 1.5 lbs.
27 to 34 min.
35 to 42 min.
About 2 lbs.
40 to 49 min.
49 to 59 min.
Always use a meat thermometer rather than relying solely on timing. Shop the SRF Super-Fast Thermometer and make perfect doneness effortless.
Common Mistakes to Avoid:
Cooking straight from frozen — thaw fully for even results.
Skipping the rest period — resting lets juices redistribute.
Under-seasoning — generous seasoning ensures a flavorful crust.
Want s fool-proof method for perfect prime rib? Explore tips and tricks from Chef Edward Higgins.
Watch Prime Rib Tips and Tricks to make sure your holiday roast is flawless:
Building Your Prime Rib Christmas Dinner Menu
Creating a memorable Christmas prime rib dinner is all about harmony — balancing rich, savory flavors with fresh, bright, and festive touches. Whether you’re hosting an intimate family meal or a full holiday gathering, a thoughtful menu brings the celebration to life. Start with light appetizers, build out hearty sides that complement the roast, and finish with a dessert that leaves everyone smiling.
Holiday Starters
Begin your prime rib Christmas dinner with something fresh and elegant. The goal is to whet your guests’ appetites without overshadowing the star of the show.
Shrimp cocktail with a tangy horseradish sauce
Smoked salmon served with lemon and dill
Fresh arugula salad with shaved Parmesan and a simple vinaigrette
These light bites bring a bright, refreshing contrast to the richness of your main course.
Holiday Sides
No prime rib dinner menu is complete without comforting sides that enhance the roast’s flavor and texture. Think creamy, savory, and beautifully seasoned.
Roasted vegetables like carrots, Brussels sprouts, or Shrimp Louie Salad
Creamy mashed or roasted Tallow potatoes for buttery depth
Yorkshire pudding or fresh dinner rolls to soak up every drop of au jus
Each dish adds balance — from the earthy sweetness of roasted veggies to the silky texture of whipped potatoes.
Holiday Desserts
End your Christmas prime rib dinner with a touch of nostalgia. Traditional sweets with a seasonal twist create a perfect finale for a luxurious meal.
Rich chocolate cake with ganache or peppermint glaze
Spiced apple pie with vanilla bean ice cream
Festive fruit tart topped with fresh berries and a hint of citrus
These desserts capture the essence of the holidays — indulgent, joyful, and just the right amount of sweet.
Our Favorite Holiday Prime Rib Recipes
Bring the full holiday menu together with these expertly crafted prime rib recipes:
Porcini-Dusted Prime Rib with Mushroom-Shallot Reduction – Elevate your prime rib with a rich, savory reduction.
Bone-In Holiday Prime Rib Roast with Au Jus – Classic flavors for an impressive holiday centerpiece.
Bone-In Prime Rib with Shallot Red Wine Jam & Black Pepper Gravy – A bold, flavorful roast with a savory-sweet twist that delights every holiday table.
Serving and Carving Your Prime Rib
Proper serving and carving ensures your Christmas prime rib looks as impressive as it tastes.
Resting Your Prime Rib
Allow the roast to rest for 10–15 minutes after slicing to let the juices redistribute. This keeps each slice tender and flavorful.
Prime Rib Carving Tips
Use a long, thin-bladed knife for clean, even slices.
Slice against the grain into ½-inch thick portions for optimal tenderness.
For bone-in roasts, separate the ribs from the bones and return them to the oven briefly to crisp before serving.
Get Your Christmas Prime Rib Today
Make this holiday season unforgettable with a show-stopping prime rib centerpiece. Here’s a quick guide to help you choose the best Snake River Farms prime rib:
Wagyu Boneless Prime Rib
Easy to carve and perfect for buffets or smaller gatherings where convenience matters.
Shop Boneless Wagyu Prime Rib →
Wagyu Bone-In Prime Rib
Impressive centerpiece with rich flavor. The bone enhances juiciness and presentation.
Shop Bone-In Wagyu Prime Rib →
Wagyu Tomahawk Roast
Show-stopping presentation with extra-long bones. Perfect for celebrations and dinner parties.
Shop Wagyu Tomahawk Roast →
Wagyu Smoked Prime Rib
Fully cooked and expertly smoked for rich flavor. Just heat and serve for a no-stress holiday meal.
Shop Wagyu Smoked Prime Rib →
Double R Ranch Bone-In Prime Rib
Classic Northwest beef with hearty flavor. A traditional choice with beautiful bone-in presentation.
Shop Double R Ranch Bone-In Prime Rib →
Double R Ranch Boneless Prime Rib
Convenient, tender, and easy to carve. A versatile choice for both holidays and special dinners.
Shop Double R Ranch Boneless Prime Rib →
Read More

The Best Way to Cook a Turkey: A Step-by-Step Guide
By: Snake River Farms
Cooking Guides
The Best Way to Cook a Turkey: A Step-by-Step Guide
By: Snake River Farms
The Best Way to Cook a Turkey
Cooking the perfect Thanksgiving turkey can feel like a big challenge. We’ve all heard the stories of dry breast meat, unevenly cooked legs, or a bird that looks beautiful on the outside but isn’t fully done in the middle. First-time cooks and seasoned hosts alike often ask: What’s the best way to cook a turkey? Should we turn it while roasting? How long should it take?
Preparing a turkey should be exciting—not stressful. With the right approach, you can roast a bird that’s juicy, golden, and unforgettable. In this guide, we’ll walk you through the best way to cook a turkey from start to finish, including how to choose the right bird, how much turkey you’ll need, and step-by-step cooking instructions.
How to Choose the Right Turkey
The centerpiece of Thanksgiving deserves to be more than ordinary. At Snake River Farms, we offer a 14 to 16 lb American Heirloom whole turkey that brings rich flavor, exceptional texture, and the kind of quality we’re proud to stand behind. Here’s why it’s the perfect choice for your holiday table:
Heirloom heritage, richer flavor – Raised from traditional heirloom breeds, this turkey delivers a depth of flavor and firmer texture that you won’t find in standard grocery store birds.
Family-owned and operated – These turkeys come from a family-run farm that’s been perfecting their craft for generations, ensuring attention to detail and a genuine commitment to quality.
Organic and responsibly raised – Certified USDA Organic, Non-GMO Project Verified, and raised without antibiotics or growth stimulants. Every step of the process supports both animal welfare and flavor integrity.
Naturally better eating experience – With heirloom genetics and thoughtful farming practices, the meat roasts up juicy and tender, making it easier to achieve a show-stopping result on your first try—or your fiftieth.
Want to learn more about what makes an heirloom turkey different from conventional breeds? Check out our guide: What Is an Heirloom Turkey?
Ready to elevate your holiday feast? Order your American Heirloom Whole Turkey now and taste the difference!
How Much Turkey Do We Need?
Planning portions is one of the most important steps in preparing a holiday meal. We recommend 1 to 1.5 pounds of turkey per adult. This gives you generous servings while leaving enough for leftovers if desired.
Portion Guidelines
1 to 1.5 lbs. per adult – Adjust for smaller appetites or if you want plenty of leftovers.
Consider the crowd – For kids or lighter eaters, aim closer to 1 lb. per person; for hearty appetites or a festive spread, lean toward 1.5 lbs.
Roasting Times by Weight
Weight
Roasting Time (Approx.)
6 to 10 lbs.
2 hrs.
10 to 12 lbs.
2 to 2 ¾ hrs.
12 to 14 lbs.
2 ¾ to 3 ½ hrs.
14 to 16 lbs.
3 ½ to 3 ¾ hrs.
16 to 18 lbs.
3 ¾ to 4 hrs.
18 to 20 lbs.
4 to 4 ½ hrs.
Pro Tip: If you’re roasting your turkey unstuffed, decrease the cooking time by about 30 minutes.
Key Temp Tip: For a juicy, perfectly cooked turkey, always prioritize internal temperature over cooking time. Roast your turkey until it reaches 150°F in the thickest part of the breast and 155°F in the legs. This ensures tenderness, safety, and moisture. Let it rest for 30 minutes before carving to allow the juices to redistribute.
We recommend the SuperFast Thermometer for instant, accurate temperature readings to guarantee a flawless result every time.
Pro Tip: Careful portion planning and using a thermometer will help you serve a flavorful centerpiece and make sure there’s enough for everyone to enjoy seconds—or leftovers.
Preparing Your Turkey
Before roasting, a little prep goes a long way toward a juicy, flavorful bird. Proper thawing, handling, and seasoning ensures your turkey cooks evenly and turns out perfectly golden. Follow these steps to get your turkey ready for the oven or smoker.
Thawing Your Turkey
Proper thawing is essential for even cooking and juicy results. We recommend planning ahead so your turkey is fully thawed before seasoning and roasting.
Refrigerator Method (Recommended)
Allow approximately 6 hours per pound of turkey.
Keep the bird in its original packaging and place it on a tray to catch any drips.
Example: A 12-pound turkey will need about 3 days to fully thaw in the fridge.
Cold Water Method (Faster)
Submerge the turkey in its original packaging in cold water.
Change the water every 30 minutes to keep it cold.
Allow roughly 30 minutes of thawing time per pound.
Example: A 12-pound turkey will take about 6 hours using this method.
Tips for Success
Never thaw your turkey at room temperature — this can create unsafe conditions.
Never thaw your turkey in the microwave — it can cook unevenly and create food safety risks.
Make sure the turkey is fully thawed before seasoning and roasting.
Planning ahead ensures the bird cooks evenly and helps you avoid stress on the big day.
Prepping the Bird
Once your turkey is fully thawed, it’s time to get it ready for the oven. A little prep goes a long way toward even cooking and a beautifully roasted bird.
Preheat the oven to 325º F.
Remove the turkey from its packaging.
Take out the neck and giblets from the cavities. You can save them for gravy or stock if you like.
Rinse and pat dry with cold water and paper towels. Dry skin helps the turkey brown nicely.
Optional: Add stuffing if desired. Keep in mind that an unstuffed turkey will cook a bit faster.
Turkey Rub
A flavorful rub is key to a perfectly seasoned turkey. Here’s how we do it:Ingredients
4 tablespoons oil (melted butter, margarine, olive oil, etc.)
4 teaspoons salt, or to taste
2 teaspoons paprika
Steps
Mix the rub ingredients together in a small bowl.
Apply the rub evenly over the exterior of the turkey. For extra flavor, gently rub some under the skin as well.
Place the turkey breast-side up in a roasting pan. Add approximately 2 cups of water or broth to the pan to keep the meat moist during cooking.
Best Way to Roast Your Turkey in the Oven
Now that your turkey is prepped and seasoned, it’s time to roast it to perfection. Roasting at a consistent temperature ensures even cooking, juicy meat, and beautifully browned skin. Following these simple steps helps take the guesswork out of roasting so you can focus on enjoying the holiday.
Oven Temperature and Timing
Preheat the oven to 325º F.
Place the turkey breast-side up in a roasting pan. There’s no need to turn the bird; it will brown evenly on its own.
Optional: Loosely cover the turkey with foil during the last hour to prevent over-browning.
Pro Gravy Tip: Heat 1 cup of white wine (do not boil) and pour it over the turkey halfway through roasting. This adds rich flavor and helps keep the meat moist.
Checking Doneness and Resting
Don’t rely on time alone. Use a thermometer to check the temperature in multiple spots. Target an internal temperature of 150°F. (measured in the thickest part of the bird) and a temperature of at least 165°F. for the legs.
Remove the turkey from the oven when it reaches the target temperature.
Cover and let rest for 30 minutes or more before carving. Resting allows the juices to redistribute for a perfectly juicy bird.
Best Way to Cook a Turkey for Beginners
Cooking your first turkey can feel intimidating, but it doesn’t have to be. By focusing on a few key steps, you can confidently roast a juicy, flavorful bird.
Key Tips for Beginners
1. Monitor internal temperature, not just time.
Cooking times vary depending on the size of your bird, oven accuracy, and whether it’s stuffed.
A reliable meat thermometer takes the guesswork out and ensures your turkey is safe and perfectly cooked.
2. Use the included nylon truss.
To secure the truss: hold the drumsticks together, lift the ring, and pull it over the drumsticks.
To remove: lift the ring and pull it up and over the end of the drumstick.
The nylon truss is oven- and microwave-safe and can withstand temperatures up to 450º F.
3. Avoid common mistakes.
Overcooking: Check the internal temperature rather than relying solely on time.
Under-seasoning: Apply your rub evenly, including under the skin if possible.
Skipping rest time: Let the turkey rest at least 15 minutes to redistribute juices before carving.
4. Quick tips from fellow cooks:
“I always tent foil over the breast if it’s browning too fast—it keeps it moist.”
“Don’t rush thawing. Fully thawed turkey cooks more evenly and tastes better.”
By keeping these tips in mind and following the truss instructions, beginners can avoid common pitfalls and roast a turkey that’s both delicious and impressive.
How to Smoke a Honey Glazed Turkey
Smoking a turkey adds a rich, smoky flavor that pairs beautifully with a sweet and tangy honey glaze. Here’s how we do it:
Ingredients
Brine:
8 cups water
½ cup kosher salt
⅓ cup sugar
1 teaspoon peppercorns
Glaze:
⅓ cup honey
¾ cup packed brown sugar
2 tablespoons unsalted butter
¼ cup apple cider vinegar
2 teaspoons Dijon mustard
¼ cup bourbon (optional)
Turkey:
5 to 8-pound bone-in turkey breast
1 tablespoon butter or canola oil
Instructions
Prepare the Brine
In a large container, combine 2 cups of boiling water with salt, sugar, and peppercorns. Stir until dissolved.
Add 6 cups of cold water and ice to cool the brine.
Submerge the turkey breast, ensuring it’s fully covered. Refrigerate for 8 hours or overnight.
Make the Glaze
In a small saucepan over medium-low heat, combine honey, brown sugar, butter, apple cider vinegar, Dijon mustard, and bourbon.
Stir to dissolve the sugar and bring to a simmer.
Continue cooking until the glaze thickens enough to coat the back of a spoon.
Prepare the Smoker
Preheat the smoker to 250°F (121°C) for indirect cooking.
Add wood chips or pellets, like apple or cherry, for a mild, sweet smoke flavor.
Prepare the Turkey
Remove the turkey from the brine, rinse, and pat dry with paper towels.
Rub the turkey with butter or canola oil to promote even browning.
Smoke the Turkey
Place the turkey breast-side up in the smoker.
Smoke until the internal temperature reaches 130°F (54°C), about 90 minutes.
Begin basting with the prepared glaze every 15 minutes.
Continue smoking until the internal temperature reaches 150°F (66°C). The temperature will rise to 155°F (71°C) as the turkey rests.
Rest and Serve
Remove the turkey from the smoker and let it rest, uncovered, for at least 20 minutes before slicing.
Serve with additional glaze on the side for dipping.
Smoking a turkey adds a rich, smoky flavor that pairs beautifully with a sweet and tangy honey glaze. Here’s how we do it. If you’re ready to get started, shop our American Heirloom whole turkey here.
Featured Recipe: Turkey and Bacon Eggs Benedict
Turn leftover turkey into a creative brunch with this easy Turkey and Bacon Eggs Benedict.
Servings: 2 to 4Prep Time: 10 minutesCook Time: 15 minutesTotal Time: 25 minutes
Ingredients:
4 English muffins, split and toasted
4 to 6 slices leftover cooked turkey
4 slices Snake River Farms bacon
4 large eggs
1 tablespoon white vinegar (for poaching eggs)
For the Hollandaise Sauce:
3 egg yolks
1 tablespoon lemon juice
½ cup melted butter
Salt and pepper to taste
Instructions
Cook the Bacon and Turkey
In a skillet over medium heat, cook the bacon until crispy.
Warm the leftover turkey slices in the same pan for added flavor.
Poach the Eggs
Fill a medium saucepan with water and bring to a gentle simmer.
Add the white vinegar.
Crack eggs into individual small bowls and gently slide them into the water.
Poach for 3 to 4 minutes until the whites are set but yolks remain runny.
Remove eggs with a slotted spoon and drain on paper towels.
Make the Hollandaise Sauce
In a heatproof bowl, whisk egg yolks and lemon juice until slightly thickened.
Slowly drizzle in melted butter while whisking continuously.
Season with salt and pepper. Keep warm.
Assemble the Eggs Benedict
Place toasted English muffin halves on plates.
Layer with warmed turkey slices, crispy bacon, and poached eggs.
Spoon Hollandaise sauce generously over the top.
Optional: Garnish with chopped chives or a pinch of paprika.
Serve Immediately
Enjoy a decadent brunch featuring leftover turkey with the rich flavor of Snake River Farms bacon.
Make the most of your leftover turkey by pairing it with the rich, savory flavor of Snake River Farms bacon. Bring this recipe to life with our Kurobuta pork bacon.
Frequently Asked Questions
Do we need to turn the turkey while roasting?
No, the bird will brown evenly without turning.
What temperature should we cook the turkey?
We recommend roasting at 325º F and checking the internal temperature for accuracy.
How much turkey should we plan per person?
Plan 1 to 1.5 pounds per adult, adjusting for leftovers or smaller appetites.
How do we make flavorful gravy?
Use pan drippings and optional white wine, heated but not boiled.
How to Choose the Right Turkey
Choose the right turkey size for your gathering—plan 1 to 1.5 pounds per adult.
Prep your bird carefully: remove giblets, pat dry, and season with your favorite poultry rub.
Roast at 325º F, monitoring internal temperature to ensure a juicy, perfectly cooked turkey.
Use leftover turkey creatively—our Turkey and Bacon Eggs Benedict is a delicious example.
Pair your meal with our signature products, like Wagyu beef roast or Kurobuta pork roasts, for a complete holiday spread.
Rest the turkey at least 30 minutes before carving to retain flavor and juices.
Ready to start your holiday feast? Shop our American Heirloom whole turkey and other holiday favorites here.
Read More

How to Smoke a Ham: Step-by-Step Guide
By: Snake River Farms
Cooking Guides
How to Smoke a Ham: Step-by-Step Guide
By: Snake River Farms
How to Smoke a Ham
Few things rival the rich aroma and bold flavor of a perfectly smoked ham.At Snake River Farms, all of our Kurobuta hams are fully cooked and smoked over real hardwood, which means you’re starting with incredible flavor from the very first slice. But here’s the secret: giving your ham a second trip through the smoker at home adds a “double-smoke” depth and lets you finish it with a glaze that makes it unforgettable.
In this guide, we’ll walk you through exactly how to smoke a ham step by step. We’ll cover how long to smoke a ham (and specifically how long to smoke a pre-cooked ham), plus share glaze inspiration like our favorite smoked ham with brown sugar glaze. We’ll also show you why beginning with a Snake River Farms Kurobuta ham guarantees unmatched flavor, tenderness, and presentation.
Before you get started, you might want to explore a few additional resources to prep your ham like a pro:
Explore More Ham Prep Guides:
How to Cook a Ham
How to Prepare the Perfect Easter Ham Dinner
The Perfect Christmas Ham
The Complete Holiday Meal: Ham Edition
Why Start with Kurobuta Ham?
Not all hams are created equal. When you’re taking the time to double-smoke and glaze a centerpiece for your table, the quality of the ham matters just as much as the method. That’s where our Kurobuta ham stands apart.
Heritage Breed Excellence - Made from 100% Berkshire hogs — known as Kurobuta in Japan — this heritage pork is celebrated for its deep color, fine-grained texture, and beautiful marbling.
Flavor Advantage - Kurobuta pork is naturally tender, juicy, and flavorful. Each ham carries a subtle sweetness and a touch of smoke from the hardwood smoking process that we build upon when you finish it in your smoker at home.
Traditional Craft - Every ham is cured with our signature family recipe, then smoked over real hardwood. This time-honored approach gives it an unmistakable flavor and quality.
Options for Every Table - Choose bone-in for a traditional centerpiece and the bonus of flavor-packed leftovers, or go with boneless for easier carving and serving. We offer both whole and half hams so you can select the right size for your gathering.
Trusted Quality - Our hams are consistently praised by professional chefs, BBQ competitors, and home cooks for their tenderness, presentation, and bold flavor.
Sustainably Raised - We partner with small family farms where Berkshire hogs are humanely cared for, never treated with hormones, and raised on a slow-feed program that enhances both flavor and quality.
When you choose Kurobuta pork, your smoked ham will stand out — rich in flavor, tender in texture, and unforgettable at the table.
Learn more about what makes our hams truly special and why Kurobuta pork is unlike any other. Read the full guide here.
Snake River Farms Kurobuta stands alone in the pork world. The color is deep and vibrant and the fat, amazingly succulent and complex.
-Chef Kris Komori - James Beard Semi-Finalist
How Much Ham Per Person & Cooking Times
Before you heat your ham, it’s helpful to know how much to serve and how long it will take. Even though our Kurobuta hams are fully cooked, warming them properly ensures they stay juicy, tender, and flavorful. Use the guide below to plan servings and heating times for any size ham.
Ham Size and Servings Recommendations: Plan for at least 8 ounces per person. If you want leftovers or are serving hearty eaters, aim for 12 ounces per person.
Ham Size
Avg. Weight
Servings
Cook Time
Internal Temp.
Half Boneless
3.5 lbs.
5 – 9
1.25 to 2 hrs.
140°F
Whole Boneless
7 lbs.
10 – 12
1.5 to 2.5 hrs.
140°F
Half Bone-In, Small
6 lbs.
8 – 10
1.5 to 2 hrs.
140°F
Half Bone-In, Large
8 lbs.
10 – 12
1.75 to 2.5 hrs.
140°F
Whole Bone-In, Large
16 lbs.
18 – 22
3.5 to 4 hrs.
140°F
Ham Cooking Guidance
All our Kurobuta hams are fully cooked, so heating times are shorter than for raw hams. Keep these tips in mind:
Target 140°F internal temperature at the thickest part of the ham.
Check several spots, especially for bone-in hams, to ensure even heating.
Avoid overheating — higher temperatures can reduce moisture and tenderness.
Shop for your perfect Kurobuta ham today and make your next meal unforgettable.
What You’ll Need to Smoke a Ham
Even though our Kurobuta hams arrive fully cooked and pre-smoked, having the right tools and ingredients ensures your finishing process adds maximum flavor and presentation appeal. Here’s what we recommend.
Smoker - A charcoal, pellet, wood-fired, or electric smoker works perfectly for finishing your ham. Set it low and slow to gently warm the ham and enhance the smoky flavor without drying it out.
Wood Chips or Chunks - We suggest apple, cherry, or hickory wood to complement the natural sweetness of our Kurobuta ham. These fruit and hardwood options create a delicate layer of smoke that enhances, rather than overwhelms, the flavor.Pro Tip: If you’re using an electric smoker, add a handful of apple or cherry wood chips to the smoker box. This gives your Kurobuta ham that extra layer of flavor you’d expect from a traditional smoker, without any extra effort.
Meat Thermometer - Even though the ham is fully cooked, a meat thermometer is essential to monitor internal temperature and avoid overcooking. We aim for a warm, juicy ham without drying the edges.Make it easy with our SuperFast Thermometer for quick, accurate readings every time.
Glaze Ingredients - Finishing your ham with a glaze adds both flavor and visual appeal. Popular options include:
Brown sugar
Maple syrup
Honey
Mustard
For inspiration, check out our Bourbon Orange Glazed Kurobuta Ham recipe — a perfect example of a sweet, savory glaze that enhances the natural richness of our ham.
Roasting Pan & Aluminum Foil - Use a roasting pan to transport your ham safely to and from the smoker. Aluminum foil is great for loosely covering the ham while it rests, keeping it moist and allowing the glaze to set.
Optional Extras - For presentation and serving, consider keeping these on hand:
Basting brush
Carving knife
Cutting board
Apron
Ready to master your smoked ham? Learn more about choosing the perfect smoker and gift-worthy options for meat lovers in our guides: An Expert's Guide to Smokers and The Ultimate Gift Guide for Meat Smokers.
Preparing Your Kurobuta Ham
A little prep goes a long way to ensure your ham heats evenly and your glaze sets perfectly. Taking the time to thaw, temper, and (optionally) score the surface sets the stage for a beautiful finish. These simple steps not only enhance flavor and texture but also guarantee your Kurobuta ham makes a show-stopping centerpiece.
Thaw the Ham Properly
Plan ahead for the best results. Fully thaw your ham in the refrigerator — larger hams can take several days. Use the guide below to estimate thawing time based on size:
Ham Size
Avg. Weight
Time to Defrost
Half Boneless
3.5 lbs.
1 to 2 Days
Whole Boneless
7 lbs.
2 to 3 Days
Half Bone-In, Small
6 lbs.
2 to 3 Days
Half Bone-In, Large
8 lbs.
2 to 3 Days
Whole Bone-In
16 lbs.
3 to 4 Days
Quick Thaw Method
Sometimes plans change, and you need your ham thawed faster. We recommend using a cool water bath only in emergencies.
For detailed instructions on thawing large cuts and hams safely, including timing tips for different sizes, check out our full guide: How to Thaw Large Cuts, Roasts, and Hams.
Watch our step-by-step video on properly thawing and handling large hams for best results: Thawing SRF Roasts and Hams Tips & Tricks.
Score the Surface (Optional)
Scoring the ham creates shallow cuts in a diamond pattern. This step:
Allows glazes to penetrate deeper
Adds a professional, attractive presentation
Select Your Glaze or Rub
Choose a glaze that complements the natural sweetness of Kurobuta pork. Options include:
Sweet (brown sugar, honey, maple)
Savory (mustard, spice rubs)
Balanced combinations (chef-inspired blends)
For inspiration and step-by-step tips on finishing your ham with the perfect glaze, check out our Ham Glaze Guide.
Position the Ham for Smoking
Place the ham fat side up on the smoker rack. This allows the natural juices to baste the meat as it warms, keeping it tender and flavorful.
Pro Tip: Lightly pat the ham dry before applying glaze. This helps the glaze adhere better and develop a beautiful, caramelized finish during smoking.
The Wagyu of Hams! Delicious Ham, not too salty, very tender. I have a family of foodies and they were very impressed with the quality of the ham, the size and the presentation. We followed a recipe (twice smoked ham) on the Snake River Farms website and it was spectacular.
- Nancy A., Verified Buyer
How to Smoke a Ham (Step-by-Step)
Even though our Kurobuta hams are fully cooked, finishing them in the smoker adds a subtle “double-smoke” flavor that makes them unforgettable. Whether you choose to glaze it or enjoy it plain, the ham will be juicy, tender, and full of rich, savory flavor. Follow these steps for beautifully warmed and flavorful results.
Steps:
Preheat the SmokerSet your smoker to 225 to 250°F for low-and-slow warming.
Place the Ham on the SmokerPosition the ham fat side up on the smoker rack, ensuring proper airflow around the meat for even warming.
Monitor Internal TemperatureWarm the ham until it reaches 135°F at the thickest part. Because it’s already fully cooked, this ensures it’s heated through without drying out.
Apply the Glaze (Optional)Brush the ham evenly with your chosen glaze. Cover and smoke for 5 minutes to set the first layer. Repeat until the glaze is fully absorbed or the internal temperature reaches 140°F.
Rest the HamRemove from the smoker and let it rest loosely covered with foil for 15–20 minutes before slicing to retain juices.
Pro Tips:
Keep a water pan in the smoker to maintain moisture.
Use mild fruit woods like apple or cherry to complement the ham’s natural sweetness.
Save the bone for soups or stews — it adds rich flavor to stocks and sauces.
For leftover ideas, check out our Leftover Kurobuta Ham Recipes.
Easy to handle as far as prepping it; the size I purchased was awesome for the crowd with plenty of leftovers. Flavor and texture are amazing. Never did I have a smoked ham this delicious. It was flavorful and juicy. I admire the quality of the product. It’s easy to tell that it’s a cut of meat that had been handled properly and with respect of the animal. The cook is, again, super easy. The ham comes with a instruction booklet. So that is very helpful.
- Rebecca M., Verified Buyer
The Benefits of Smoking a Kurobuta Ham
Finishing a fully cooked Kurobuta ham in the smoker adds extra flavor and depth, creating a tender, juicy centerpiece that stands out at any meal.
Unmatched Flavor - Our Kurobuta hams are naturally tender, juicy, and packed with rich, smoky-sweet flavor. Finishing them in the smoker adds another layer of depth, creating a centerpiece your family and friends will remember.
Expertly Crafted - Cured with a time-honored family recipe and smoked over real hardwood, our hams deliver consistent, high-quality results every time.
Perfect for Any Occasion - Whether it’s holidays, backyard BBQs, or family dinners, smoking your ham elevates every table and makes any meal feel special.
Simple to Prepare - Because our hams are fully cooked, the smoking process is approachable for any home cook. Follow our step-by-step guide for professional results with minimal effort.
Shop Kurobuta hams now to start planning your next unforgettable meal.
Read More

Cooking with Beef Tallow: How to Unlock Bold Flavor and Better Sear
By: Snake River Farms
Cooking Guides
Cooking with Beef Tallow: How to Unlock Bold Flavor and Better Sear
By: Snake River Farms
Cooking with Beef Tallow: Bold Flavor & Better Sear
How to Unlock Bold Flavor and Better Sear. If you’re serious about flavor, start with what goes in the pan. Beef tallow is a high-heat cooking fat that delivers crisp edges, golden crusts, and deep, savory flavor — especially when paired with richly marbled American Wagyu beef.
Used by chefs for generations and trusted for its performance, beef tallow holds up under intense heat and adds a layer of richness that oil just can’t match. Whether you’re searing a Snake River Farms ribeye, roasting vegetables, or frying potatoes, a spoonful of tallow takes every bite to the next level.
Our 100% pure American Wagyu Beef Tallow is rendered and ready to use — with a high smoke point perfect for searing, sautéing, frying, or roasting. Even a small dollop adds incredible depth and richness. It’s an easy way to bring restaurant-quality results into your own kitchen.
What Is Beef Tallow?
Beef tallow is simply rendered beef fat. It’s solid and velvety at room temperature, and turns smooth and creamy once heated.
For generations, chefs and home cooks have prized tallow for its versatility, long shelf life, and ability to handle high heat without breaking down. Its naturally high smoke point makes it ideal for pan searing steaks, deep frying potatoes, or roasting vegetables to golden perfection.
Unlike many processed cooking fats, quality beef tallow is naturally shelf-stable and clean, containing no additives or preservatives — just pure flavor that enhances whatever you’re cooking.
How to Make Your Own Beef Tallow
While you can render beef tallow at home (see the step-by-step method below), we offer premium rendered Beef Tallow that’s ready to use right out of the jar. It saves you time in the kitchen and delivers consistent, rich flavor every time.
Pro Tip for Tallow Enthusiasts: Brisket trimmings are especially good for rendering tallow because they’re packed with flavorful fat. Learn more about making the most of your brisket trimmings here.
How to Render Beef Tallow at Home
Chill the fat. Place trimmings on a sheet pan in the freezer until the edges are firm but the pieces are still pliable.
Trim the meat. Remove all meat from the fat, then cut the fat into 1-inch pieces.
Smoke the fat. Add the fat pieces to a disposable aluminum pan and place in your smoker while the brisket is cooking. Depending on your smoker size, position it beside or on a shelf under the brisket.
Render slowly. Cook for about 4 hours at 250°F, stirring occasionally to prevent burning, until the fat has fully rendered into tallow.
Strain well. First strain through a small mesh strainer, then strain again through cheesecloth. Removing impurities will help your tallow last longer and taste better.
Store safely. Place the strained tallow in a glass container. Use immediately in liquid form or let it solidify as it cools. Store in the refrigerator for up to 3 months.
Ready to skip the rendering and start cooking? Shop Snake River Farms Beef Tallow — perfectly rendered, rich, and ready to elevate everything from steaks to roasted vegetables.
Why We Cook with Beef Tallow
Beef tallow is one of those timeless cooking fats that delivers on performance, flavor, and quality. It’s clean, versatile, and stands up to high-heat cooking — all while adding subtle richness to every bite. Here’s why it’s a favorite in our kitchens.
It’s Clean and SimpleBeef tallow is a single-ingredient cooking fat with no seed oils, fillers, or chemicals. It’s far less processed than most common cooking oils, making it a great choice for whole-food, low-carb, or keto-style cooking.
It Performs at High HeatWith a smoke point around 400°F, beef tallow is ideal for searing, frying, and roasting. It holds up better than olive oil, butter, or vegetable oil, helping you achieve crisp edges, deep caramelization, and a steakhouse-style crust.Pro Tip: Add 1–2 tablespoons to a hot cast-iron pan before searing your favorite steaks for incredible flavor and texture.
It Adds Rich, Savory FlavorTallow has a subtle beefy taste that enhances anything it touches. It adds richness and umami without overpowering, making it especially good with bold, flavorful cuts like Ribeye, New York Strip, and Bavette.
The Health Benefits of Beef TallowNaturally rich in monounsaturated fats, tallow also contains fat-soluble vitamins A, D, E, and K. It’s a clean-burning fat that won’t break down into harmful byproducts at high heat, and it fits well with keto, paleo, carnivore, and whole-food diets.
Feature
Beef Tallow
Olive Oil
Butter
Smoke Point
~400°F (204°C)
Extra virgin: ~375°F (191°C)
Unsalted butter: ~350°F (177°C)
Flavor
Savory, beefy
Fruity, herbal (extra virgin)
Rich, creamy
Best Uses
Searing, frying, roasting
Dressings, sautéing, low to medium heat cooking
Baking, light sautéing, flavoring
Shelf Stable
Yes, shelf stable for months if stored properly
No, extra virgin olive oil should be refrigerated after opening for longer storage
No, butter requires refrigeration
Processing
Minimal, rendered pure fat
Varies, extra virgin is least processed; refined oils more processed
Minimal, churned dairy fat
Why Choose Beef Tallow? Beef tallow shines in high-heat cooking where many oils fall short. It’s the go-to choice when you want bold flavor, a perfect sear, and a clean, simple ingredient in your kitchen.Discover the rich, versatile flavor of Snake River Farms Beef Tallow—shop now and cook with confidence.
How to Use Beef Tallow in the Kitchen
Beef tallow is incredibly versatile and can elevate almost any dish with its rich flavor and high-heat performance. Here are some of the best ways to use it in your cooking:
Sear Your SteakAdd a spoonful of beef tallow to a hot cast-iron skillet before searing. It helps create a beautiful golden-brown crust without burning, locking in juices and flavor.
Roast or Fry PotatoesUse beef tallow with fingerling potatoes, smashed taters, or steak frites. It produces crispy outsides and tender, fluffy centers that keep everyone coming back for more.
Sauté Veggies or AromaticsMushrooms, onions, garlic, and other aromatics get deeper flavor and better browning when sautéed in beef tallow.
Fry or Finish MeatsWhether it’s steak bites, burger patties, or rib tips, finishing meats in beef tallow adds richness and depth. It also makes a great base for gravies and pan sauces.
Cooking Tip: Always melt beef tallow before adding it to hot pans for the best results and even cooking.
Recipes That Showcase the Power of Beef Tallow
Beef tallow enhances the flavor, texture, and sear of every ingredient it touches — especially when paired with high-quality American Wagyu. Here are some of our favorite ways to cook with it, from steakhouse-style mains to crave-worthy sides.
Steakhouse Classics with Elevated Sear
Wagyu Steak au PoivreThis peppercorn-crusted steak benefits from a high-heat sear in beef tallow, delivering a crisp crust and a rich pan sauce that elevates every bite.
Filet Mignon with Tallow-Seared Mushrooms and OnionsTender filet meets golden-brown mushrooms and caramelized onions — all cooked to perfection in rendered tallow for deep, savory flavor.
Seared Ribeye Filets with Crispy PotatoesBold, juicy ribeye filets develop a perfectly golden crust, paired with crispy potatoes seared in beef tallow for an unbeatable combination.
American Wagyu Steak StroganoffClassic comfort food with next-level richness — finished with a spoonful of beef tallow for extra depth and silkiness.
Want to recreate the steakhouse crust at home? Start with premium Snake River Farms American Wagyu or USDA Choice and Prime steaks and sear them in our rendered beef tallow for flavor that hits every time.
Impressive Roasts and Braises
Herb-Crusted Boneless Rib Roast with Red Wine GravyA holiday-worthy centerpiece that roasts beautifully with beef tallow, resulting in a golden crust and tender interior.
Tri Tip with Marinated Cucumbers and Tallow PotatoesTallow-roasted potatoes steal the show in this bright, beef-forward dish — perfect for summer grilling.
Planning a dinner party or weekend roast? Stock up on premium cuts like tri tip and rib roast, and don’t forget the beef tallow to make your sides shine.
Sides That Steal the Spotlight
Smashed Tallow Taters with Spicy AioliCrispy on the outside and fluffy inside — this side dish makes the most of beef tallow’s high-heat crunch.
Garlic Butter Steak BitesBite-sized flavor bombs made even better with a pre-sear in beef tallow before finishing with garlic butter.
Bavette Steak FritesClassic French bistro vibes, with fries that practically demand to be cooked in beef tallow.
Your fries and veggies deserve better than olive oil. Get that golden, crispy finish with Snake River Farms Beef Tallow — soon to be available in our ready-to-cook tin.
Frequently Asked Questions
How do I use beef tallow for cooking?
Use it like oil or butter — sear, sauté, roast, or fry.
Is beef tallow better than olive oil?
For high heat, yes. Tallow stays stable and adds rich flavor.
What does beef tallow taste like?
It’s mild, savory, and slightly beefy — enhances flavor without overpowering.
Does beef tallow need to be refrigerated?
No, it is shelf stable.
Final Thoughts: A Flavor Essential Worth Having on Hand?
Beef tallow is a clean, stable cooking fat that brings next-level flavor and performance to your kitchen.Perfect for steak lovers and anyone who cooks at high heat, it delivers crispy sears and rich, savory notes every time.Bring bold flavor and perfect sears to your kitchen. Our 100% pure American Wagyu Beef Tallow is rendered, ready to use, and ideal for steaks, roasted vegetables, and more. Shop Now →
Read More

The Best Cuts of Steak for Grilling: A Complete Guide
By: Snake River Farms
Cooking Guides
The Best Cuts of Steak for Grilling: A Complete Guide
By: Dave Yasuda
The Best Cuts of Steak for Grilling: A Complete Guide
Outdoor cooking is one of the best things about summer, but it’s not easy choosing the best steak to throw on the grill. There are so many different cuts to choose from, how do you know which steak will deliver the most flavor, tenderness and make the biggest impression? Here’s a guide to the world of steaks so you can choose the best cuts for grilling.Any steak can be cooked on a grill, but here are two factors that make some cuts perform better than others.
1. Marbling
Choose a steak with generous marbling. Marbling, or intramuscular fat, provides flavor, creates a juicier steak, adds tenderness and promotes even cooking on the grill.
Learn more about marbling →
2. Thickness
A thicker steak distributes the heat and cooks more evenly. A thin steak may cook too fast on a hot grill. Choose steaks that are at least 1 inch thick. For best results use steaks that are 1½ inches thick.
Why steak thickness matters →
Table of Contents
What Makes a Great Grilling Steak
Which Cut of Steak is Best for Grilling
What are the Best Butcher’s Cuts for Grilling
What's the Most Tender Steak to Grill
Quick Decision Guide
Tips for Grilling the Perfect Steak
Which Cut of Steak is Best for Grilling?
The best steak cut for grilling is a personal choice. What do you want the most from a steak? Factors to consider are tenderness, flavor and value. Your steak choice will vary based on the occasion or desired dining experience. The steak for an impromptu Tuesday night cookout will be much different than the one for your dad’s birthday celebration. Here are five top contenders for steaks to grill. Each of these are well-known cuts and perform well on a charcoal or gas grill.
Ribeye – Ranked the number one steak by beef aficionados due to its intense marbling and rich beefy flavor. The high amount of intramuscular fat creates a tender, juicy and savory steak.
New York Strip – Well marbled, but leaner than a ribeye. A firm, moderately tender texture and deep beef flavor. It is easy to trim and slice since it does not have large pockets of fat.
Filet Mignon – The most tender of all steaks with a buttery texture. Lightly marbled with a mild flavor.
Porterhouse – Two steaks in one: a tender filet mignon and a robust New York strip separated by a T-shaped bone.
Sirloin – A lean steak with satisfying beef flavor and a pleasing firm bite. A popular cut that represents excellent value.
Pro Tip: For a bold, juicy grill favorite, start with a well-marbled American Wagyu Ribeye. Want a recipe to match? Try our Cowboy Steak with Blistered Corn and Tomatoes.
Grill-Ready Idea: Fire up a New York Strip and turn it into a show-stopping sandwich with this Grilled NY Strip with Goat Cheese & Pesto.
What are the Best Butcher’s Cuts for Grilling?
Butcher’s cuts are the steaks without the pedigree of the popular, and higher priced, steakhouse favorites. These cuts are sourced from multiple locations and possess unique flavors and textures that are enhanced when cooked on a grill.
Outside Skirt Steak – This steak is the diaphragm muscle, which receives a lot of exercise and creates deep flavor. A surprisingly marbled cut that is exceptionally rich and buttery. It has a thick, strong grain, so cutting against the grain is critical for a tender bite.
Bavette – A cut from the bottom sirloin, it’s also known as the “flap meat”. It has a thick grain with a loose texture which crisps up beautifully on the grill. The flavor is very beefy with a hint of minerality.
Picanha – The foundation of Brazilian style, this triangular shaped cut is juicy, flavorful with a firm texture. Also known as the sirloin cap and the coulotte, this is a large cut that can be cut into steaks or grilled as one piece.
Hanger Steak – A long, coarse grained cut from the plate primal. Moderate marbling adds juiciness while the overall flavor profile is intensely beef-forward with a subtle mineral edge.
Flank Steak – A favorite steak with moderate marbling, bold beef essence and a tender bite when cut against the grain.
Pro Tip: Curious about lesser-known cuts? Explore our guide to Underrated Butcher’s Cuts and try something new on the grill.Try This: Grilled Hanger Steak shines with a punchy chimichurri recipe, or make your next taco night legendary with our Flank Steak with Confetti Corn.
What's the Most Tender Steak to Grill
If your top priority is melt-in-your-mouth texture, filet mignon is the most tender steak you can grill. Cut from the psoas major, a non-weight-bearing muscle, it’s naturally soft and buttery even without extensive marbling. Take one bite of filet mignon and you’ll know immediately this is a very tender steak. It’s not just your senses, but it is scientifically proven to be the most tender of all steaks using the shear force test. Using this objective method, here is a list of the most tender steaks as identified by meat scientists:
Filet Mignon – The most tender steak you can grill, filet mignon delivers a smooth, buttery bite with subtle flavor and an elegant finish.
Flat Iron – Well marbled and juicy with excellent beefiness, this steak is best served medium rare to medium, but remains flavorful when cooked to higher temperatures.
Cap of Ribeye Steak – Sometimes called “the tastiest cut on the cow” this legendary cut is beautifully marbled, juicy and delicious.
Zabuton – A richly marbled cut from the chuck (shoulder) with a buttery texture and robust flavor. It’s also known as the Denver steak.
Teres Major – Another gem from the chuck, this is also known as the shoulder tender. Shaped like a small tenderloin, it is packed with deep, savory richness.
Tenderness Tip: Filet Mignon is the king of tenderness—but flat iron and Zabuton offer amazing texture at a great value.Try This: Go beyond classic with these Kalbi-Style Tenderloin Kebabs.
Quick Decision Guide
Can’t decide? Here’s a quick reference to help you pick the perfect steak based on what matters most to you.
Beef Flavor vs. Tenderness
If You Want...
Choose...
Bold Beef Flavor
Ribeye, Skirt, Hanger
Maximum Tenderness
Filet Mignon, Flat Iron
Cooking Style
Cooking Method
Best Cut
Quick Sear
Ribeye, Strip, Skirt
Reverse Sear
Thick Ribeye, Porterhouse
Marinate & Slice
Flank, Skirt, Hanger, Sirloin
Budget
Price Point
Recommended Cuts
Premium Picks
Filet Mignon, Ribeye, Porterhouse
Great Value
Flat Iron, Sirloin, Denver
Pro Tip: Can’t decide? Try multiple cuts with one of our SRF Boxes. They’re curated for variety, value, and unforgettable grill nights.
Tips for Grilling the Perfect Steak
Let it Rest Before and After — Bring steak to room temp before grilling. After grilling, rest it 5-10 minutes to retain juices.
Season Simply — Salt and pepper go a long way. Let the beef shine.
Use High Heat — Get your grill hot (450°F+) to sear and lock in flavor.
Don’t Overcook — Use a meat thermometer: Rare: 120-125°F | Medium-rare: 130-135°F | Medium: 140-145°F
Slice Against the Grain — Especially important for flank, skirt, and hanger cuts. Slicing against the grain shortens muscle fibers, making the bite more tender.
More Ways to Master the Grill: Get step-by-step techniques and recipes in our Cooking Guides.
Final Thoughts
Whether you're grilling up a celebration-worthy porterhouse or slicing marinated skirt steak for tacos, the right cut makes all the difference. Ribeye, filet mignon, and strip steaks consistently top the charts for their flavor and grill-worthiness, while lesser-known options like flat iron and Denver steak offer surprising tenderness at a great value. The key is to match the cut to your taste preferences, cooking method, and budget. With this complete guide in hand, you’re ready to light the fire and grill the perfect steak every time.
Author Bio
Dave Yasuda has worked with Snake River Farms for over 12 years, cooking virtually every product we sell. He has prepared SRF products for photoshoots, food festivals, company events, and customers. A skilled home cook, Dave has collaborated in the kitchen with award-winning chefs, recipe developers, and content creators to enhance his culinary skills. He has also been a featured guest on numerous food-centric podcasts, including Bon Appetit’s “Dinner SOS” hosted by Chris Morocco.
Read More

Cowboy Steak vs Tomahawk: What's the Real Difference
By: Snake River Farms
Cooking Guides
Cowboy Steak vs Tomahawk: What's the Real Difference
By: Dave Yasuda
Cowboy Steak vs Tomahawk: What's the Real Difference
The cowboy and tomahawk are two impressive steaks. Deciding which one to bring home doesn’t have to be confusing. Both are thick cut, bone-in ribeye steaks but the primary difference is the length of the rib bone. Either one is a frontrunner to win any steakhouse showdown.
We get questions about these cuts almost every day. What is the real difference? Is it easier to cook the cowboy? Is the Tomahawk’s long bone just for show – or is there more to it?
At Snake River Farms, we have decades of experience cutting and cooking both cowboy and tomahawk steaks. Whether you're deciding what to throw on the grill or what to send as a gift, we’ll walk you through the key differences so you can feel confident choosing the one that fits your moment.
"I have been a long time supporter of SRF. Their product is really unmatched when it comes to the three things I really look for in quality meat; taste, texture and marbling. SRF always hits those markers, creating the perfect balance and bite every time."
- Chef Tim Hollingsworth
Table of Contents
What Is a Cowboy Steak?
What Is a Tomahawk Steak?
Cowboy and Tomahawk: Same Cut, Different Style
Which Steak Should You Choose? Our Expert Perspective
FAQs About Cowboy Steak vs Tomahawk
How to Choose the Right Steak for You
What Is a Cowboy Steak?
The cowboy is a large bone-in ribeye steak that’s cut the full width of a rib bone. The rib bone is frenched, which means the bone is cleaned of any excess material. This gives the cowboy steak a hearty, eye-catching appearance.
This is the steak cowboys are said to have cooked for themselves on the open range. They needed a big steak to fuel them after a long day in the saddle and to get ready for the hard work to come.
What Makes a Cowboy Steak a Cowboy Steak?
This steak is defined by its size and structure. Unlike a boneless ribeye, the cowboy includes a portion of the rib bone, adding weight, visual impact, and flavor during cooking.
SRF Cowboy Steaks are generously cut to the full width of the rib bone, and include two signature muscles: the tender longissimus dorsi (eye of ribeye) and the flavorful spinalis (ribeye cap), separated by rich kernel fat that renders beautifully when seared or grilled.
Want to dive deeper into this bold, bone-in classic? Check out our full Cowboy Steak Guide for expert tips, cooking methods, and why it’s one of our most impressive cuts.
Understanding the Cowboy Steak
Frenched bone length: About 2 inches beyond the steak.
Steak size: Average weight: 2.5 lbs.
Contains the fine grained center eye surrounded by the succulent cap.
“This Wagyu cowboy ribeye and the thickness was amazing. Tender, juicy and great taste! I’m a SRF customer for life! I’ve tried other meat companies. SRF has great products, well packaged, and fair price.”
- Vincente G., Verified Buyer
How to Cook a Cowboy Steak for Maximum Flavor
The Cowboy Steak is a large, thick-cut bone-in ribeye with bold flavor and an eye-catching presentation. Averaging 2.5 pounds, it features a signature Frenched bone and the kind of marbling that delivers both richness and tenderness in every bite. Its impressive size and shape make it a natural centerpiece for any special occasion.
To bring out the best in this steak, cook to medium-rare or medium to allow the marbling to fully render. The reverse sear method is ideal—it ensures even doneness throughout and finishes with a beautifully caramelized crust.
Here is step by step guide to reverse sear a cowboy steak using an oven and stove top:
Season - Heat oven to 250°F to 275°F degrees. Season steak with salt and pepper. Cover a baking sheet with foil and place a metal rack in the middle. The idea is to elevate the steak from the pan.
Cook - Place the pan and steak in the oven. Bake until the steak reaches your preferred temperature: 120°F for medium-rare, 130°F for medium. This can take 45 to 60 minutes but begin checking the internal temperature at 20 minutes.
Rest - Remove steak from oven, loosely cover with foil and allow it to rest for 10 to 15 minutes.
Sear - Add a light coating of vegetable oil to a heavy skillet and heat over high heat until hot. Sear steak on both sides and the edges for 60 to 90 seconds to form a beautiful crust. Serve.
This method also works outdoors on a gas or charcoal grill. Set up the grill with two cooking zones, a hot side and a cool side. Place all the coals on one side of the grill for the hot side and leave the other side open for the cool side. On a gas grill turn the burner on one side and leave the other burner off.
The steak can be moved to control temperature and avoid charring. Since the cowboy is a richly marbled steak the fat dripping on the coals can cause flare-ups on the hot side. When this happens, move to the cool side.
Ready to try it yourself? Follow our step-by-step Reverse Seared Cowboy Steaks with Chimichurri recipe for a flavorful finish—and don’t forget to stock up on the star of the show. Shop our Cowboy Steaks to bring this impressive cut to your table.
What Is a Tomahawk Steak?
Like the cowboy, the tomahawk is a large bone-in ribeye steak that’s cut the full width of a rib bone. The rib bone is frenched, which means the bone is cleaned of any excess material. The primary difference is the length of the rib bone. It extends about 12 inches beyond the steak which gives the tomahawk a striking, jaw-dropping appearance.
The steak is called a tomahawk because of its resemblance to the Native American tool of the same name. A tomahawk is a single-handed axe that was made with a wooden handle and stone head attached with a leather cord.
What Makes a Tomahawk a Tomahawk?
The tomahawk steak is a thick-cut ribeye steak with the rib bone left in place. This sounds like the description of a cowboy steak, but the tomahawk has a frenched rib bone that is about 10 to 12 inches in length. Although the primary portion of both steaks is almost identical, the long rib bones give the tomahawk a distinctive appearance.
SRF tomahawk steaks are cut the full width of the rib bone which equates to a thickness of about 3-inches. The tomahawk is cut from the rib primal and contains at least 2 different muscles, the longissimus dorsi which is the large center portion and the spinalis or outer section. These two muscles are separated by an unctuous layer of kernel fat.
The entire steak contains an intense amount of rich intramuscular fat (or marbling) which gives the ribeye its hearty beef flavor and juiciness.
Ready to find your perfect tomahawk? Explore our full guide to choosing the ideal cut and shop our premium American Wagyu tomahawk steaks to bring it home.
Understanding the Tomahawk Steak
Frenched bone length: about 10 to 12 inches beyond the steak.
Steak size: Average weight: 2.5 lbs.
Contains the fine-grained center eye surrounded by the succulent cap. Flavor and tenderness on par with cowboy, but the long bone puts an emphasis on presentation.
“Finally ordered the Wagyu tomahawk ribeye and was so happy when the box arrived. I salted it once it thawed and dry brined it in the fridge for a few days. Then, the real stuff happened! Placed it in the pellet smoker till it hit my desired temp then used some of the fat off the steak and rendered it so I can sear it in a pan in its own fat for the ultimate crust. Tasted it on its own and tasted it with my compound butter with bone marrow. Excellent steak! Excellent quality and marbling. Thank you Snake River Farms for such an excellent product and such a beautiful cut. I’ll be back for more soon!”
- Bobby, Verified Buyer
How to Cook a Tomahawk Steak Like a Pro
The tomahawk a large steak weighs in about 2 ½ lbs., because it has a high amount of marbling, cooking to medium rare or medium allows the marbling to fully render and produces the best flavor and texture.
The reverse sear is an excellent method for a cut of this size since it cooks the entire steak consistently. The steak is then seared to create a crisp, flavorful crust.
You can cook a tomahawk steak outdoors using a charcoal or gas grill. Start the steak at a low temperature of about 250°F to 275°F to evenly cook it from edge to edge, then finish it on a hot grill.
For a charcoal grill with a lid (like a Big Green Egg or Weber kettle) light a full chimney of charcoal. When fully lit, arrange the coals on one side of the grill and leave the other side open with no coals. Close the lid and adjust the vents so the temperature is 250°F to 275°F. (If using a Big Green Egg, you can also set up indirect cooking with a ceramic convEGGtor.)
For gas grills, light one burner and leave one off. Close the lid and adjust the burners so the temperature is 250°F to 275°F.
Season the tomahawk generously with kosher salt or your favorite steak rub.
Place steak on the cool side so the indirect heat. Close the lid and cook until the internal temperature of the steak reaches your preferred temperature: 120°F for medium-rare, 130°F for medium. This can take 45 to 60 minutes but begin checking the internal temperature at 15 minutes. When you check the temperature, inspect the steak to see how it is cooking. Flipping the steak helps maintain a consistent cook.
When the steak comes to your desired temperature, remove and put on a platter.
Open all the vents or turn the burners on high. Sear the tomahawk on all sides to achieve a golden brown exterior. Use tongs and sear the thick sides to crisp up the fat cap.
Let rest for 5 to 10 minutes and serve.
Indoors start in the oven at 250°F to 275°F to bring the steak to temperature and finish on a hot skillet. See the “How to Cook a Cowboy Steak for Maximum Flavor” section above for a full guide.
Want to see the reverse sear in action? Try our chef-tested tomahawk recipes like the Reverse-Seared Tomahawk with Lemon and Herb Butter or the Coffee Crusted Tomahawk with Charred Scallion Chimichurri to bring out the best in this epic cut.
Cowboy and Tomahawk: Same Cut, Different Style
The cowboy and tomahawk are both large, bone-in ribeye steaks packed with rich marbling, full flavor and tender texture. They both have a fine-grained center eye surrounded by a layer of fat and the luxurious exterior cap. For practical purposes, they are the same cut but in the world of culinary theatrics, the tomahawk is the more photogenic and provides the greatest impact. Here is a side-by-side comparison.
FEATURE
COWBOY STEAK
TOMAHAWK STEAK
CUT TYPE
Thick-cut ribeye
Thick-cut ribeye
BONE-IN
Yes
Yes
BONE LENGTH
About 2 inches
About 12 inches
MARBLING
Intense marbling
Intense marbling
FLAVOR
Tender, juicy, bold beef flavor
Tender, juicy, bold beef flavor
COOKING METHOD
Reverse sear, grill
Reverse sear, grill
COOKING NOTES
Smaller bone length fits 10 or 12" skillet
Long bone requires a flat surface for pan searing
PRICE POINT
SRF Gold®: $158
SRF Gold®: $189
BEST FOR
High-quality casual meals. To elevate a weekend grilling session. Higher end gifting.
Special occasions. Maximum visual appeal. Wow-factor dinners. Gift giving for high impact.
Which Steak Should You Choose? Our Expert Perspective
Honestly, you can’t go wrong with either of these impressive steaks. Each thick-cut bone-in ribeye is tender, rich and packed with juicy flavor. Any steak lover will jump at the opportunity to dig into these feast-worthy cuts. Here are some factors to consider:
Flavor Comes from the Cut, Not the Bone Length
The length of the bone doesn’t impact the taste; instead, it’s all about how the steak is cooked to ensure the fat melts perfectly throughout the cut.
Both the cowboy and tomahawk steak come from the rib primal, the specific source of high-quality ribeye cuts. This section contains rich marbling that creates tenderness and exceptional beef flavor. Steaks cut to 3 inches are rare and offer a robust dining experience.
Why We Offer Both Cowboy and Tomahawk Steaks
Choosing a steak is based on personal preference and the dining occasion. For the more practical home cook, the additional cost of a tomahawk doesn’t pencil out. The shorter frenched rib bone makes the cowboy steak easier to cook in a standard sized skillet and to fit on smaller grills.
For fans of the tomahawk steak, the chorus of oohs and aahs that fill the air when a tomahawk is placed on the table is a priceless experience. This is the steak that is a show-stopping centerpiece, where the dramatic presentation of a tomahawk takes center stage.
Gifting: Both cuts make amazing gifts. Whether you're celebrating Father's Day or sending a gift box for a special occasion, you can’t go wrong with either steak. A single steak makes a great gift or choose a curated SRF box for a greater impression.
Tomahawk TreasuresA gift box with two SRF Gold® tomahawk steaks is one of our most spectacular gifts.
The Great GiftA SRF Gold® cowboy steak is accompanied by SRF Black® ribeyes and 2 SRF Gold® NY strips to create a steakhouse experience in a box.
Steak SubscriptionsA Snake River Farms steak subscription lets you send high-quality steaks like these directly to your door, making both cuts available for every type of occasion.
Still deciding between a cowboy steak and a tomahawk? Here are answers to some common questions to help you choose with confidence.
Frequently Asked Questions about Cowboy Steak vs. Tomahawk
Are Cowboy and Tomahawk Steaks the Same Cut?
Yes, both steaks are sourced from the rib primal and except for the length of the rib bone are the same steak. Key Points/Details: Both steaks are thick-cut bone-in ribeye steaks. Cut the full width of the rib bone making them a hefty 3-inches thick. Made up of at least 2 different muscles, the longissimus dorsi which is the large center portion and the spinalis, also known as the cap of ribeye. Intensely marbled with generous intramuscular fat which provides hearty beef flavor and juiciness.
Which One is Easier to Cook?
While both steaks are simple to prepare, the cowboy steak’s shorter rib bone makes it easier to cook in most cast iron skillets, grills and smokers. The cowboy has a shorter frenched bone that fits in standard size skillets and smaller grills. The tomahawk’s longer bone does not fit in smaller or deeper skillets, but preparing it is still straightforward.
Why is it Called a Cowboy Steak?
This is the steak cowboys are said to have cooked for themselves on the open range. They needed a big steak to fuel them after a long day in the saddle and to get ready for the hard work to come.
How to Choose the Right Steak for You
There is no right or wrong when it comes to comparing the cowboy to the tomahawk steak. Both are savory bone-in ribeye steaks, but here are some things to keep in mind:
Think About Your Grill or Oven Size
Key Point: If you have a smaller grill or pan, the tomahawk may be a challenge to fit, so the cowboy steak could be the better choice.Curious why thickness matters more than weight? Learn how we cut our steaks for ideal cooking results—no matter the cut—in our guide to SRF steak thickness. Read the article.
Choose Based on the Occasion
Cowboy Steak: Best for weekday indulgences or casual get-togethers where you want to elevate the dining experience. Perfect for grilling up a delicious meal with ease.
Tomahawk Steak: Ideal for big occasions—think special dinners, celebrations, or gifting as a showpiece.
Hosting a dinner party? Whether it’s a girls’ night or a guys’ night in, you can easily swap in a cowboy or tomahawk steak to elevate the menu and make your gathering unforgettable.
Still Can’t Decide? Try Both!
Key Point: If you’re still on the fence, consider ordering both cuts for a steak-tasting night or a side-by-side cooking experiment.
Gift Solution: E-gift cards are a perfect option for those who want to let someone choose their steak based on personal preferences.
Whether you lean toward the rugged cowboy or the dramatic tomahawk, both cuts deliver rich flavor and striking presentation. Thanks to the incredible marbling of our American Wagyu, you can’t go wrong either way—just pick the one that fits your occasion.
Author Bio
Dave Yasuda has worked with Snake River Farms for over 12 years, cooking virtually every product we sell. He has prepared SRF products for photoshoots, food festivals, company events, and customers. A skilled home cook, Dave has collaborated in the kitchen with award-winning chefs, recipe developers, and content creators to enhance his culinary skills. He has also been a featured guest on numerous food-centric podcasts, including Bon Appetit’s “Dinner SOS” hosted by Chris Morocco.
Read More

How to Cook Wagyu Steak Like the Pros
By: Snake River Farms
Cooking Guides
How to Cook Wagyu Steak Like the Pros
By: Snake River Farms
How to Cook Wagyu Steak
Want to know how to cook Wagyu steak like the pros? With its rich marbling and luxurious texture, Wagyu deserves special attention—and the right technique makes all the difference. Whether you're preparing a steakhouse-style dinner at home or trying this prized cut for the first time, a few pro tips will help you get it just right.Learn how to cook Wagyu steak to perfection with the best techniques and tips to enjoy a tender, juicy, and flavorful dining experience.
Table of Contents
Choosing the Right Cut
Preparing Wagyu Steak
Cooking Methods for Wagyu Steak
Resting and Serving Wagyu Steak
Common Mistakes to Avoid
Go Forth and Grill
Choosing the Right Cut
As anyone who has surveyed a meat counter knows, there are many different steak cuts. Steak is defined as “a thick cut of beef” which doesn’t narrow down your choices. The most popular cuts are the ones featured on steakhouse menus, and all come from the rib and loin sections of beef cattle.
These include:
Ribeye - The ribeye is intensely marbled with a bold beefy flavor and tender texture. The ribeye has a center eye and an outer cap of ribeye separated by a swath of fat. Look for thick cut steaks with abundant flecks and streaks of marbling.
Strip – A strip steak is highly marbled with excellent flavor and a slightly firm texture. Each steak has an external fat cap on one side and a large uniform section that is easy to slice and yields very little waste.
Filet Mignon – Prized for its incredible tenderness and mild flavor, the filet mignon has a fine buttery texture that melts in your mouth. A boneless cut without a fat cap and light marbling, this steak has a mild beef flavor.
Sirloin – Lean, flavorful, and a bit on the chewier side, sirloin is one of the most popular cuts for good reason. It’s more budget-friendly than the steaks listed above, making it a smart pick when you're serving a crowd.
Explore our full lineup of American Wagyu
Preparing Wagyu Steak
Preparing American Wagyu steak starts well before it hits the heat. In the section below, we’ll walk through essential steps like thawing, seasoning, and bringing your steak to room temperature. Each one is designed to help you get the most out of your investment.
How to Properly Thaw Wagyu
Frozen steaks retain their quality when slowly thawed in a refrigerator. Set frozen steaks on a plate or rimmed pan to catch any drips and place in the refrigerator. Thin steaks will thaw overnight, and larger steaks may take 48 hours. Plan ahead and thaw slowly to maximize the quality of Wagyu steaks.
Meat scientists at Texas A&M have found that quickly freezing and slowly thawing beef has little to no impact on quality. At Snake River Farms, we use a blast freezer set to -20°F to reduce freezing time and minimize the formation of ice crystals, helping preserve the steak’s texture and flavor.
Want a step-by-step guide? Check out our full article on how to thaw a Wagyu steak to make sure your steak is perfectly prepped every time.
Should you Season Wagyu?
Wagyu beef possesses a rich flavor which is enhanced by simply seasoning with kosher salt. If preparing Wagyu for the first time, this is an excellent way to discover its unique flavor profile.
Even with its rich, beefy flavor, don’t hesitate to use your favorite seasonings and rubs. Personal preference plays a big role in finding the best way to season your Wagyu steak.
Looking for the perfect finishing touch? Explore our full selection of gourmet salts to enhance the flavor of your Wagyu steak.
Bringing the Steak to Room Temperature
Many chefs and grill masters recommend letting a steak sit at room temperature so it will cook quickly and evenly. This is a tip that you’ll also find in many books and websites. J. Kenji Lopez-Alt, James Beard award winning author of The Food Lab took the time to put this to the test and found resting at room temperature has little impact on the finished quality of a steak. If you decide to let your steak sit at room temperature prior to cooking, do not let it sit longer than 2 hours – the maximum amount of time the USDA recommends for food safety.
Cooking Methods for Wagyu Steak
Cooking Wagyu steak requires a thoughtful approach to highlight its exceptional marbling and flavor. Below, you'll find three proven methods: pan searing, grilling, and sous vide. Each technique offers a unique way to bring out the best in your steak.
Pan-Seared Wagyu
This simple method sets an even, golden brown crust on a steak’s exterior and allows the option of adding flavor through the use of aromatics and butter-basting.
This simple method sets an even, golden brown crust on a steak’s exterior and allows the option of adding flavor through the use of aromatics and butter-basting.
Best Pan to Use – A cast iron pan is the ideal tool for pan-searing steaks. A thick heavy pan holds heat for a long period of time and sears a steak quickly so the interior does not overcook.
Best Oil or Cooking Medium – A neutral vegetable oil is a good choice for pan-searing steaks. There are many sources that cite the benefits of Wagyu tallow which has a high smoke point and imparts additional flavor to the steak. It’s an excellent option if you have it on hand.
Pan-Searing Guide
SeasonHeat a heavy skillet (cast iron is ideal) over medium heat until hot. Add a light coat of vegetable oil to the skillet. Season top side of steak with salt and pepper.
SearPlace steak, seasoned side down, in skillet and sear 4 to 5 minutes until nicely browned. If the steak sticks to the skillet, it’s not ready to turn. Wait until it releases on its own.
FlipTurn steak over and allow to cook for an additional 3 to 5 minutes. After 2 to 3 minutes, use a thermometer to test the thickest part of the steak. When the temperature reaches the desired level, remove from the skillet. Serve.
Want to see the pan-searing method in action?
Watch our quick how-to video to learn how to achieve a perfect crust, use aromatics like a pro, and finish your steak with a rich butter baste:
Grilling Wagyu
Grilling steak is a time-honored method, especially popular during the warmer months. Charcoal grilling, in particular, adds distinctive flavor and texture. While any cut can be grilled, thick steaks (at least 1 ½") with more marbling such as ribeye or strip steak are preferred. Use a 2-zone set-up with your grill. For charcoal, put all the hot coals on one side and leave the other side empty. This creates a hot side for searing and a cool side for bringing the steak to your preferred temperature. This also gives you a side to move the steak as melted fat hits the coals and flares.
Grilling Guide
Generously season steak with kosher salt.
Set up your grill with 2 cooking zones, leaving the vents open all the way.
Place steaks on the cool side of the grill and close the lid. Flip the steaks and check their temperature every 3-4 minutes. The targets are 110°F for medium-rare or 120°F for medium.
When the desired temperature is reached, move the steaks to the hot side of the grill to do a final sear. About 1 minute per side. It’s fine to flip the steaks again if you desire a deeper char.
Remove the steaks and place on a cutting board. Rest 5 to 10 minutes. Serve.
Want to level up your grilling game?
Check out these expert tips and guides to help you get the most out of your grill set-up:
Grilling Essentials
The Ultimate Grill Guide
Gas, Charcoal, or Wood? Here's How Each Impacts Flavor
Ready to see it in action
Watch this quick video for a step-by-step look at the 2-zone grilling method and tips to get that perfect sear every time:
Sous Vide Wagyu
Sous vide is a surefire method to cook a Wagyu steak with an interior that is evenly pink and juicy from edge to edge. It’s the ideal method for anyone who wants total control and consistent, even results every time. Sous vide temperatures differ from conventional methods. Since the steak is cooked in a moist environment, it’s best to use higher temperatures. Set your immersion circulator (the sous vide device) to these temperatures:
Rare - 115°F
Medium-rare - 125°F
Medium - 135°F
The time to cook a steak using sous vide varies depending on its size and thickness. In general, the minimum cook time is 1 hour. While it’s technically possible to sous vide a steak for several hours due to the precise temperature control, cooking it too long can result in a steak with an overly soft texture. Filet mignon should be cooked for less time since this cut has less marbling and can dry out more easily.
Rare - 1 to 2 hours
Medium-rare – 1 to 3 hours
Medium – 1 to 4 hours
For food safety reasons, do not cook steaks for more than 3 hours when the temperatures is set at less than 130°F.
Sous Vide Guide
Set up a water bath and select the desired temperature on the immersion circulator.
Generously season steak with kosher salt.
Place steak in a vacuum seal or ziplock bag. Add aromatics like garlic, rosemary, etc. if desired. Seal bag.
Set the sealed bag in the water bath and cook using the recommended times.
When ready, pull the bag from the water bath. Open the bag and remove the steak. Place on a plate and pat dry with paper towels.
Coat a cast iron pan with a layer of neutral vegetable oil and heat over high heat.
When the oil begins to smoke, place the steak in the pan and sear for about 1 minute. Flip and sear the other side. The steak is fully cooked, so sear just long enough to set a golden crust.
If preparing a thick steak, use tongs to hold the steak on edge and sear the sides.
There’s no need to rest a sous vide cooked steak. Serve immediately.
Curious how sous vide works with American Wagyu?
Watch this step-by-step video to see how sous vide delivers edge-to-edge perfection—and how to finish with a sizzling sear that locks in flavor.
Resting and Serving Wagyu Steak
Once you’ve cooked a beautiful steak, it’s important to properly rest and serve it. In the preparation instructions above, there is a note to rest your Wagyu steak. After the steak has reached your desired temperature, place it on a cutting board and let it rest for 5 to 10 minutes. Resting allows the temperature to equalize throughout the entire steak and gives time for the muscle fibers to reabsorb the natural juices. If you cut a steak open when it comes directly off the grill or skillet, it will release the juices onto the cutting board. This is a simple step that makes a big difference. Steaks are the most tender when sliced against the grain. The muscle fibers of a steak run in a specific direction which is with the grain. Cutting the steak perpendicular to the grain shortens the muscle fibers and makes the steak more tender.
Common Mistakes to Avoid
Overcooking your Wagyu steakCooking to high temperatures causes the muscle fibers to contract and displace the moisture and fat making a steak tough and dry.
Using too much (or not enough) seasoningWagyu steaks are naturally flavorful, but seasoning with kosher salt is a fundamental enhancer and helps beef’s inherent qualities blossom. Using your favorite rub with aromatics and seasonings adds additional flavor components. Conversely, using too much salt or rub overpowers the natural Wagyu flavor and has a negative effect on a steak’s natural goodness.
Not resting properlyResting your steak allows the temperature to equalize throughout the entire cut and the natural juices are reabsorbed. Skipping this crucial step results in a loss of the juices.
Avoid the most common steak mistakes—Wagyu deserves better. Take your technique to the next level with these tools and tips designed to help you cook with confidence:
The #1 Tip for Cooking Steak Perfectly Every Time
Explore Our Collection of Salt & Gear
Shop the Superfast Thermometer
Go Forth and Grill
Here’s a quick recap of key tips to help you cook American Wagyu like a pro:
Choose the cut that suits your taste and occasion.
Thaw your steak slowly in the fridge for the best texture.
Season simply with kosher salt—or use your favorite rub to layer on flavor.
Pick a cooking method that fits your style and gear: grill, pan-sear, or sous vide.
Use a meat thermometer for precision—don’t rely on guesswork.
Let your steak rest for 5 to 10 minutes before slicing and serving.
American Wagyu is more than a meal—it’s an experience. With just a little preparation and the right technique, you’ll serve up a steak that’s rich, tender, and unforgettable. Now fire up that grill (or cast iron) and enjoy the delicious difference.
Read More

How to Pick a Good Steak
By: Snake River Farms
Cooking Guides
How to Pick a Good Steak
By: Dave Yasuda
Guide to Picking the Perfect Steak
An unforgettable steak dinner starts with the perfect steak. A great steak is flavorful and tender. These characteristics are impacted by the amount of marbling (intramuscular fat) a steak contains, how the steak is aged (wet or dry) and the length of the aging period. SRF is a genuine pioneer of American Wagyu beef with 56 years of experience in the industry. Our care and expertise provide quality you can taste with each bite of our steaks.
Table of Contents
Understanding Steak Quality
Choosing the Right Steak for Your Cooking Method
Picking the Best Steak by Cut
Common Steak Buying Mistakes (and How to Avoid Them)
Key Factors for Choosing a Great Steak
Our Final Pro Tips for Picking the Perfect Steak
Understanding Steak Quality
Marbling – The Key to Flavor and Tenderness
Marbling refers to the white streaks and flecks of intramuscular fat distributed in a steak. It’s an attribute you can actually see when choosing a steak. Marbling adds flavor, tenderness and juiciness to a steak, so higher amounts of marbling results in a superior steak.
USDA Grades vs. SRF American Wagyu (BMS)All steaks sold in the U.S. are inspected and graded by the USDA. The top three grades, from less to more marbling, are USDA Select, USDA Choice and USDA Prime. Only 3% to 4% of all beef in the U.S. achieves the Prime grade. Since all SRF American Wagyu grades are at or above USDA Prime, we use the Japanese Beef Marbling Score (BMS) to measure marbling at an even more precise level. Learn more about how USDA Prime compares to American and Japanese Wagyu in our detailed guide.
SRF American Wagyu QualityThe high level of marbling found in SRF beef translates to juicy, flavorful and tender steaks. Compared to top rated USDA Prime beef, American Wagyu beef has higher levels of tenderness, buttery aroma and umami, a savory and lingering component that enhances the natural beef flavor of our steaks. This exceptional quality is directly tied to beef grading, which measures factors like marbling and texture to determine overall meat quality. Learn more about how grading impacts steak selection and what sets SRF American Wagyu apart.
"It has the richness of Japanese beef with lots of marbling, but the flavor is more akin to what we're used to in America. You can give me a pound of the best Wagyu from Japan, or a pound of this, and I'll choose Snake River Farms every time."Chef Wolfgang Puck
The Aging Process: Wet-Aging vs. Dry-Aging
Aging is a technique that plays a crucial role in creating flavor and tenderness in beef. Wet and dry aging each offer distinct characteristics that enhance the steak eating experience. It is important to age beef for at least three to four weeks, in order for flavor and texture to develop.
Wet-AgingThis method vacuum seals beef (SRF uses large, sub primal cuts) in plastic bags and places them in refrigerated storage. The natural enzymes break down the beef, so it is more tender and the natural flavor is enhanced. Very little weight is lost through wet aging.
Dry-AgingLarge cuts of beef are placed in a carefully controlled environment and allowed to slowly age. There is significant moisture loss in this process which concentrates the beef flavor and tenderizes the meat. The end result is beef that is tender with an earthy aroma and nutty richness.
Choosing the Right Steak for Your Cooking Method
There are many ways to cook a steak and selecting the right steak for a specific cooking method is essential to achieve the best results. Individual cuts perform differently depending on factors like marbling, muscle structure and thickness, which affect how the meat cooks and retains moisture. Learn more about the best way to cook a steak to get the perfect sear, texture and flavor.
Best Steaks for Grilling
Grilling is a time-honored method for cooking steak to impart a smoky aroma and crisp touch of char. Most steaks take well to the grill, but marbled cuts are more heat resistant and the melted fat hitting the coals add the coveted outdoor flavor.
Here are the best steaks to throw on the grill:
Ribeye, Tomahawk and NY Strip: These steaks are rich with marbling which helps retain juiciness over the high heat of the grill. These are thick steaks and are best prepared with a 2-zone set up with a hot and cool side of the grill. Start on the cool side to bring them up to temp, then sear on the hot side.
Pro Tip: Look for thick cut steaks (1 ½” or more) for better heat control. Thicker steaks have greater mass and allow you to achieve a golden brown sear on each side and maintain a medium rare interior.
Best Steaks for Pan Seared Perfection
Cooking steaks indoors on a cast iron skillet is ideal when it’s cold outside. Pan searing is a great technique, regardless of the weather. since it imparts flavor and creates a solid caramelized crust on each side of the steak.
Here are some great steaks to pan sear:
Filet mignon and ribeye filetThese are steaks that are tender and caramelize well. Filet mignon is naturally low in marbling and is an excellent candidate for butter basting to increase flavor, especially when herbs and aromatics are added to the pan.
Add flavor by basting with butterAn easy to add flavor and richness to a pan seared is butter basting. As the steak comes close to the finished temperature, turn down the heat and add 2 to 3 knobs of good quality butter. For more flavor, add sprigs of fresh rosemary, thyme and a crushed garlic clove to the melted butter. Use a large spoon to baste the steak.
Best Steaks for Slow Cooking or Braising
By definition, a steak is a cut of beef that cooks quickly and has very little connective tissue. Bona fide steaks are not great candidates for slow cooking methods.
Picking the Best Steak by Cut
When it comes to choosing a steak you have many choices. Each type of steak has unique attributes to consider. Knowing the characteristics of each cut provides the knowledge to choose the best steak for your personal preferences and cooking methods.
Ribeye
The ribeye is known as the “steak lover’s steak” since it is intensely marbled to ensure a bold beefy flavor and tender texture. The ribeye has at least two parts, the premium center eye and the succulent cap. A rich fat cap separates these muscles which adds richness as it melts when exposed to heat.
Look for thick cut steaks with visible flecks and streaks of marbling distributed throughout the center eye.
Shop Ribeye Steaks
New York Strip
This is one of the top sellers at steakhouses because of its firm texture with a balance of tenderness and yielding chew. This is steak with an impressive appearance from large streaks of intramuscular fat that run across the narrow side.
The New York strip has an external fat cap on one side, but the main section is uniform so it’s easy to slice and eat with minimal waste.
The balanced marbling and firm texture combine for a steak that is flavorful and a tactile delight to eat.
Shop New York Strips
Filet Mignon
This lean steak is the single most tender cut available. The SRF Wagyu filet mignon takes this to another level with a buttery texture that is fork tender and mild in flavor. The filet mignon is proven by meat scientists to be the most tender cut of beef, although you don’t need to be an expert to understand its melt-in-the-mouth texture.Since this is a lean steak, it pairs beautifully with rich sauces like béarnaise and peppercorn or served with flavorful compound butters.
Shop Filet Mignon
Flank & Skirt Steak
Although these two steaks are not well known, they are worth discovering. Flank and skirt steaks have a strong, coarse grain that absorbs marinades well. They are delicious grilled simply but are excellent in ethnic recipes like carne asada or bulgogi.
Immerse these steaks in liquid marinades for 2 to 12 hours. Dry rubs also work well to impart flavor.
For the most tender bite, identify the direction of the grain and slice across it to shorten the muscle fibers.
Shop Flank Steaks
Common Steak Buying Mistakes (and How to Avoid Them)
A great steak dinner starts by selecting the best steak for the characteristics you enjoy and the cooking method you plan to use. Ignoring these factors can lead to disappointing results. Avoid steak mistakes by considering the cut, thickness and marbling.
Choosing the wrong cut for your cooking style Remember that certain cuts work best with specific cooking styles. For example, lean, tender filet mignon is an excellent choice for pan searing and butter basting, while a thick cut ribeye performs well on a charcoal grill.
Overlooking marbling and texturePay attention to the amount of marbling in the steaks you choose. The more intramuscular fat a steak contains, the more beef flavor, juiciness and tenderness you'll experience. Steaks with a high level of marbling are more forgiving, regardless of the cooking method.
Key Factors for Choosing a Great Steak
Pay attention to the small details like marbling and thickness make a significant difference in making restaurant quality steak at home. Starting with a great steak is the first step to preparing and serving a memorable dinner.
Opt for thick cuts for better heat retention and superior results after searing.
Let your steak rest for at least 10 minutes after cooking. This allows the heat to distribute throughout the steak and the natural juices to be reabsorbed.
If in doubt, choose a steak with higher marbling. This all but guarantees flavor and a steak that’s more forgiving to cook.
Our Final Pro Tips for Picking the Perfect Steak
A well-prepared steak is more than a meal – it’s a culinary experience. When learning how to pick a good steak,, marbling is key — those thin streaks of fat running through the meat add incredible flavor and tenderness.
Thickness matters too. Steaks at least 1.5 inches cook more evenly and allow for a perfect sear without overcooking the inside. Where the steak is sourced from the animal affects texture and taste — cuts like ribeye or strip come from more tender areas, while sirloin offers a balance of flavor and firmness.
Matching the cut to your cooking method is essential; for example, well-marbled cuts shine with high-heat grilling, while leaner cuts benefit from slower, controlled cooking. If you're unsure which steak is best for your next celebration, check out our guide to picking the perfect steak for special occasions to impress your guests with the ultimate cut.
Ready to elevate your steak game? Explore the exceptional quality of Snake River Farms American Wagyu steaks and taste the difference for yourself!
Author Bio
Dave Yasuda has worked with Snake River Farms for over 12 years, cooking virtually every product we sell. He has prepared SRF products for photoshoots, food festivals, company events, and customers. A skilled home cook, Dave has collaborated in the kitchen with award-winning chefs, recipe developers, and content creators to enhance his culinary skills. He has also been a featured guest on numerous food-centric podcasts, including Bon Appetit’s “Dinner SOS” hosted by Chris Morocco.
Read More

Holiday Ground Rules: 5 Easy Recipes with Wagyu Ground Beef
By: Snake River Farms
Cooking Guides
Holiday Ground Rules: 5 Easy Recipes with Wagyu Ground Beef
By: Snake River Farms
Holiday Ground Rules: 5 Easy Recipes with Wagyu Ground Beef
The holiday season brings friends and family to town. While the focus is on festive celebrations and elaborate meals, everyone still needs to be fed for non-holiday meals. We have a simple solution for the days before the big dinner or after the leftovers are gone: SRF Wagyu ground beef.This restaurant quality product has a flavor profile that transcends grocery store ground beef and makes everyday dishes special. Some of our favorite chefs share five recipes for dishes that take advantage of the same ground Wagyu used by top chefs. For variety, we included a recipe using our Kurobuta ground pork with a rich, slightly sweet flavor. Stock up on these convenient one-pound packs and break new ground for elevated, but easy, comfort food for the dinner table.
1. Bacon-Wrapped Wagyu Meatloaf
Meatloaf is so versatile. You can serve it with tomato base accompaniments (can you say ketchup?) or fancy it up with a quick gravy. I love to slice it cold and make a sandwich. SRF Wagyu ground beef really brings up the flavor of this classic dish. You can make this in less than an hour, but try the two day method for the best results. Prepare the mix and let it sit overnight so all the flavors meld together. Bake it the day before serving to let it firm up, then serve it the next day. > Cook Now
2. Kurobuta Pork & Mushroom Ragu
Rich and deeply flavorful Kurobuta ground pork transforms this simple but satisfying dish into one worthy of center stage at your next gathering. To that end, the ragù may be made ahead and warmed over low heat. > Cook Now
3. Wagyu Ground Beef Mac & Cheese
The silky smooth cheese sauce in this homey dish uses sodium citrate, a culinary salt easy to buy online. It acts as an emulsifier, so the cheese sauce doesn’t require a binder, like a roux, to hold it together. The combination of fontina, taleggio, and smoked gouda cheeses perfectly accents the flavor of the SRF beef. Recommended types of cheese, plus the brands I used, are listed but tasting multiple kinds of cheese to pair with your palate is half of the fun! > Cook Now
4. Kofte Kebab with Tzatziki and Israeli Salad
Kofte, a Turkish ground meat mixture loaded with flavor from a variety of spices, is often made into meatballs. We like to make kebabs, shaping this flavorful meat around a wooden skewer and grilling it, either over hardwood lump charcoal or a gas grill. Each skewer is served on a piece of naan (or in a lettuce cup) with tzatziki. The Kofte pairs well with a simple salad of ripe tomatoes and sweet onion seasoned with red wine vinegar and mint. > Cook Now
5. Air Fryer Beef Ricotta Meatball
Tender, moist and ultra-beefy, these SRF Wagyu ground beef meat balls adapt to your mood and menu. They’re right at home on top of a plate of spaghetti, tucked into a meatball sub or served as an appetizer. The air fryer cooks them quickly, giving the outside a nice crust, without drying out the inside. > Cook Now
Read More

Holiday Feast Tips: Savory Tricks and Must-Have Treats for Perfect Meals
By: Snake River Farms
Cooking Guides
Holiday Feast Tips: Savory Tricks and Must-Have Treats for Perfect Meals
By: Snake River Farms
Holiday Feast Tips: Savory Tricks & Must-Have Treats for Perfect Meals
Take your holiday feast up a notch with these savory tips. The trick? It’s all in the details. The experts have weighed in, and we’re here to share the (tasty) results.
Multiple Choice: Elevate Your Feast with Double R Ranch USDA Choice Steaks
Double R Ranch USDA Choice steaks are sourced from our network of family ranches in the Northwest, where the climate is ideal for quality beef. Good marbling and great flavor make these steaks a tremendous value. An excellent way to sample a robust tomahawk or try a butcher’s cut like the teres major.DRR USDA Choice Tomahawk | 2.5 lbs. | $79 > Shop Now DRR USDA Choice Teres Major | 1.5 lbs. | $32 > Shop Now
The Perfect Temperature: Fast & Accurate Thermometer for Perfect Roasts & Steaks
No need to play the “is it done yet?” guessing game when you have this accurate, fast read thermometer. Take the temp in just one second and serve a perfect steak or roast every time.Thermapen® ONE | $109 > Shop Now
How Do You Like Them Apples? Sweeten Your holiday Breakfast with Apple Brined Bacon
Make your holiday breakfast delicious, and a touch sweet, with our artisan uncured bacon from the experts at Journeyman Meat Co. They start with SRF Kurobuta pork bellies and brine them in real Sonoma apple juice, then smoke over real applewood for a nuanced sweetness and smokey, savory finish.Apple Brined Uncured Bacon | 12 oz. | $19 > Shop Now
Take it with You: Jacobsen Infused Salt Tins for Perfect Flavor Anywhere
Pack these handy slide tins of Jacobsen salts to season meals out on the town or outside for picnics and camping. This gift worthy package contains six tins including Pure Flake Salt and five flavorful salt infusions that range from aromatic to spicy. Each container holds about ½ ounce.Jacobsen Infused Slide Tin Collection | $38 > Shop Now
Chill Out: Does Resting Your Roast at Room Temperature Improve Cooking?
Should you let your roast sit at room temperature before cooking? Many chefs and home cooks say the meat will cook faster and more evenly. We agree with Kenji Lopez-Alt, chef and author of The Food Lab. His research (and our own experience) found letting a roast rest at room temperature does not have a significant impact on cooking time or finished quality. If you decide to temper your roast before cooking, target a maximum of four hours as recommended by the USDA.
How to Season Prime Rib: Simple Tips for a Delicious Roast
One of the most frequently asked questions is how and when to season a holiday roast. Our beautifully marbled prime ribs are delicious seasoned with just salt and pepper, but feel free to use aromatics like garlic and rosemary. SRF Rosemary Roast Seasoning is an easy short cut for a decadent prime rib.SRF Rosemary Roast Seasoning | $15 > Shop Now
The Long Game: Unlocking Maximum Flavor for Your Prime Rib
For the most savory seasoned prime rib, start 24 to 48 hours in advance. Season generously on all sides and place the prime rib uncovered in the refrigerator. This allows time for the salt and seasonings to impart flavor to the beef and dries the surface of roast for a golden brown sear.
Quick Start: The Best Way to Season Prime Rib When Time is Tight
Short on time? Season your prime rib 15 or 20 minutes before placing it in the oven. The surface of the roast will remain dry and it will cook nicely. Don’t try to extend the time. After about 25 or 30 minutes, the salt pulls water from the roast and will create a moist exterior. (When allowed to sit overnight, this surface moisture is reabsorbed by the roast.)
Iron It Out: Smithey No. 12 Cast Iron Skillet - A Timeless Kitchen Essential
This handcrafted cast iron skillet from Smithey melds classic style with modern workmanship. Its 12” diameter provides enough surface area to cook up meals for four. The signature polished interior is beautiful to behold and is naturally non-stick. A wonderful addition to your kitchen and makes a special gift.Smithey No. 12 Cast Iron Skillet | $210 > Shop Now
How to Slice a Bone-In Ham: Expert Tips for Perfect Slices Every Time
You’ve probably heard chefs say to slice meat “against the grain.” But where exactly is the grain on a ham? The muscles that make up a ham run parallel to the bone. The natural tendency is to simply slice along the side, but this cuts the ham with the grain. Cut large sections of the ham in the same direction of the bone. Turn these on their side, then slice the smaller sections and serve.
Read More

Alternatives to Turkey for the Holidays
By: Dave Yasuda
Cooking Guides
Alternatives to Turkey for the Holidays
By: Dave Yasuda
Alternatives to Turkey for the Holidays
Turkey is the customary star of holiday meals. Although it’s most often tied to Thanksgiving dinner, Americans eat an estimated 22 million turkeys on Christmas. It’s a dish steeped in family history, but a poll by the AP-NORC Center for Public Affairs Research found just 3 in 10 U.S. adults say turkey is their favorite dish for their holiday feast. The primary reason Americans serve turkey is tradition. It’s what their mother, grandmother and great-grandmother made for holiday meals, so it’s the family convention that everyone follows.We completely understand that turkey for the holidays is a sacred ritual that many just can’t abandon. But for those pioneering souls looking to break free of the shackles of a turkey-fueled Thanksgiving, Christmas, or other major celebration, we present three delicious alternatives. Each one is festive, appetizing and offers loads more flavor than the old-school bird.
1. Kurobuta Boneless Ham: A Juicy, Flavorful Holiday Alternative
SRF hams are juicy, tender and packed with flavor. Made with 100% Berkshire pork (also known as Kurobuta in Japan), which has more fine marbling than conventional breeds, these hams are often rated the "best" in numerous comparisons. Made with traditional smokehouse methods using a signature cure, these hams are a crowd-pleaser and have become a new tradition for many of our customers.The boneless hams are easy to prepare and a cinch to carve. They are available in multiple sizes, so it's easy to find the perfect size for your holiday meal. For those looking for a traditional appearance, SRF also offers a bone-in Kurobuta ham.
2. Tenderloin Roast: The Perfect Holiday Dish for Steak Lovers
Savor the same mild flavor and tenderness of filet mignon steak when you serve this elegant roast. The tenderloin roast is a simple way to elevate your Thanksgiving feast, which your guests will talk about for weeks to come. A helpful feature of this impressive roast is how quickly it cooks. A reverse sear takes about an hour so you can spend more time with your guests.
SRF offers tenderloin roasts cut from American Wagyu or USDA Choice beef. American Wagyu options include three different levels of marbling, from excellent to outstanding: SRF Silver™, SRF Black® and SRF Gold®.
3. Kurobuta Rack of Pork: A Show-Stopping Roast for Holiday Feasts
This bone-in Kurobuta pork roast has quietly become one of our favorite items to serve for holiday meals. We like to think of it as the pork equivalent of a bone-in beef prime rib, and it is an exciting roast to bring to the table. Each rack includes 10 to 12 bones providing a generous serving for 8 to 10 guests. This impressive roast is easy to make and takes about an hour to prepare, which means you don’t have to spend all day in the kitchen to serve a magnificent holiday feast.
Read More

Smoke Show: Effortlessly Elevate Your Holidays with SRF Smoked Prime Rib – Just Heat & Serve
By: Snake River Farms
Cooking Guides
Smoke Show: Effortlessly Elevate Your Holidays with SRF Smoked Prime Rib – Just Heat & Serve
By: Snake River Farms
Smoke Show: Effortlessly Elevate Your Holidays with SRF Smoked Prime Rib – Just Heat & Serve
A Snake River Farms prime rib makes any holiday table brighter and so much more delicious. We didn’t think it was possible to add more flavor to our American Wagyu roasts, but Bryan and Rachel Bracewell of Southside Market and Barbeque shared their idea. Start with a SRF Silver™ prime rib and carefully smoke it over genuine Texas post oak in Southside’s authentic smoker. The result is a cooked, juicy prime rib with a hint of smoke and the natural flavor of SRF American Wagyu beef.
“No surprise here,” says Bryan, “it’s just high quality beef, simple dry rub, real post oak wood, and time.” Southside is the oldest BBQ joint in Texas, a state famous for authentic barbeque. They handcraft our smoked SRF brisket, spare ribs and sausages. Just in time for the holidays, we present our smoked American Wagyu prime rib. It ships frozen. Just thaw, heat to 115°F, rest and serve. Now it’s effortless to serve a perfect holiday prime rib.
Add a Touch of Texas to the Holidays
SRF Smoked Prime Rib | Average weight: 5.5 lbs. | $349
A SRF Silver™ prime rib is hand trimmed, hand seasoned, and smoked low and slow with real Texas post oak. Just heat in the oven, smoker or grill to your desired finished temp, rest and serve. > Shop Now
Leftover Prime Rib Recipes for Flavorful Meals
Leftover Prime Rib and Barley SoupTransform your leftover prime rib into a hearty, comforting beef and barley soup in just 30 minutes. This flavorful dish features tender prime rib, mushrooms, and soy sauce for added umami, with classic pearled barley adding the perfect texture. A quick and satisfying meal for any day.After the prime rib has rested, slice and serve. > Cook Now
Leftover Prime Rib French DipTurn your leftover prime rib into a delicious French dip sandwich with thinly sliced meat, creamy horseradish, and savory au jus for dipping. Quick and full of flavor, this easy recipe is perfect for using up your leftovers. > Cook Now
Leftover Prime Rib Pot PieTurn your leftover prime rib into a cozy, hearty pot pie with flaky puff pastry. Prepare the filling ahead of time, then bake for a comforting meal that’s perfect for using up holiday leftovers. > Cook Now
Read More

How to Cook Steaks
By: Snake River Farms
Cooking Guides
How to Cook Steaks
By: Snake River Farms
Discover a variety of steaks, from tender filet mignon to flavorful ribeye and bold New York strip. This guide covers cooking methods to elevate each unique cut to perfection.
Read More

How to Cook a Porterhouse Steak
By: Snake River Farms
Cooking Guides
How to Cook a Porterhouse Steak
By: Snake River Farms
Master the perfect Porterhouse steak with this guide from Snake River Farms. Learn key steps to achieve a tender, flavorful result every time you cook.
Read More

How to Cook a New York Strip Steak
By: Snake River Farms
Cooking Guides
How to Cook a New York Strip Steak
By: Snake River Farms
Discover how to cook a New York strip steak like a pro. This guide covers everything from selecting the perfect cut to achieving the ideal sear and doneness.
Read More

How to Cook a Sirloin Steak
By: Snake River Farms
Cooking Guides
How to Cook a Sirloin Steak
By: Snake River Farms
Learn how to cook the perfect sirloin steak with Snake River Farms’ easy-to-follow guide, ensuring a tender and flavorful result every time.
Read More

How to Cook a Flank Steak
By: Snake River Farms
Cooking Guides
How to Cook a Flank Steak
By: Snake River Farms
Flank steak is a versatile cut known for its rich flavor. Discover quick tips and techniques to cook it to perfection, ensuring a tender and delicious meal.
Read More

How to Cook a Ribeye Steak
By: Snake River Farms
Cooking Guides
How to Cook a Ribeye Steak
By: Snake River Farms
Get the best out of your ribeye steak with this quick guide. Whether you're grilling, pan-searing, or broiling, learn the essential steps to achieve a perfectly cooked, flavorful steak every time.
Read More